Saturday 15 October 2011

Chocolate Chip Cookie Dough Blizzard (guaranteed chemical free)


I used to be a DQ addict. I loved me a Blizzard. Was it ice cream? Was it cookies? Oh it’s both all blended up in a paper cup! But now that we are vegan and more health conscious I wouldn’t touch a DQ Blizzard with a barge pole.

Let’s first take a look at the ingredients in the Dairy Queen Cookie Dough Blizzard, shall we?

Chocolate Chip Cookie Dough: Unenriched Wheat Flour, Sugar, Margarine (Palm Oil, Water, Soybean Oil, Mono- and Diglycerides, Artificial Flavor[Milk], Colored with Annatto, Calcium Disodium EDTA added as a preservative, Vitamin A Palmitate added), Chocolate Chips (Sugar, Chocolate Liquor, Cocoa Butter, Soy Lecithin [Emulsifier], Vanilla), Powdered Sugar (Sugar, Corn Starch), Butter (Cream, Salt), Pasteurized Eggs, Brown Sugar, Corn Starch, Natural and Artificial Flavor, Salt.
Dairy Queen Vanilla Soft Serve: Milkfat and nonfat milk, sugar, corn syrup, whey, mono and diglycerides, artificial flavor, guar gum, polysorbate 80, carrageenan, and vitamin A palmitate.
Fudge: High Fructose Corn Syrup, Sweetened Condensed Skim Milk (Skim Milk, Sugar, Corn Syrup), Partially Hydrogenated Coconut Oil, Water, Fructose, Cocoa processed with Alkali, Cocoa, Sodium Alginate (Algin, Dextrin, Sodium Phosphate), Salt, Mono & Diglycerides (Vegetable), Potassium Sorbate (a preservative), Soy Lecithin, Disodium Phosphate, Artificial & Natural Flavors
720 calories 28g fat (14 of that saturated) 370mg sodium 78g sugar Yup you read that correctly.
I got this idea for making a DQ style healthy blizzard from the blog Oh She Glows. Here recipes rock my socks. Here’s a link to her blog where you see how she makes this delicious healthy treat. http://ohsheglows.com/2011/03/18/chocolate-chip-cooke-dough-blizzard 

The next time you get over ripe bananas then peel, chop into bits and freeze. 3 frozen bananas makes enough for 2 servings of ice cream. When you’ve got bananas frozen and ready to go then make your cookie dough.

Cookie Dough Balls

Yield: 1 cup packed cookie dough
  • 1/2 cup unsalted cashews
  • 1/4 cup rolled oats
  • 1/4 cup whole wheat pastry flour (I make it gluten free with buckwheat flour)
  • 1/2 tsp kosher salt
  • 1.5 tbsp natural cane sugar
  • 1/2 tsp pure vanilla extract
  • 3-4 tbsp pure maple syrup (or a bit more if dough is too dry)
  • 2 TB-1/4 cup dark chocolate chips

Directions: In a food processor, add the cashews and oats and process until it forms a fine crumble. Now add in the salt, sugar, and flour and process for a few seconds more. Add in the maple syrup and vanilla and process until combined. It will be sticky, but this is normal! Add in your chocolate chips and stir by hand or process. Form into 16 balls. Store in fridge.


Now make the ice cream. Throw your 3 frozen bananas in your food processor with a few splashes milk (we use Oat milk)


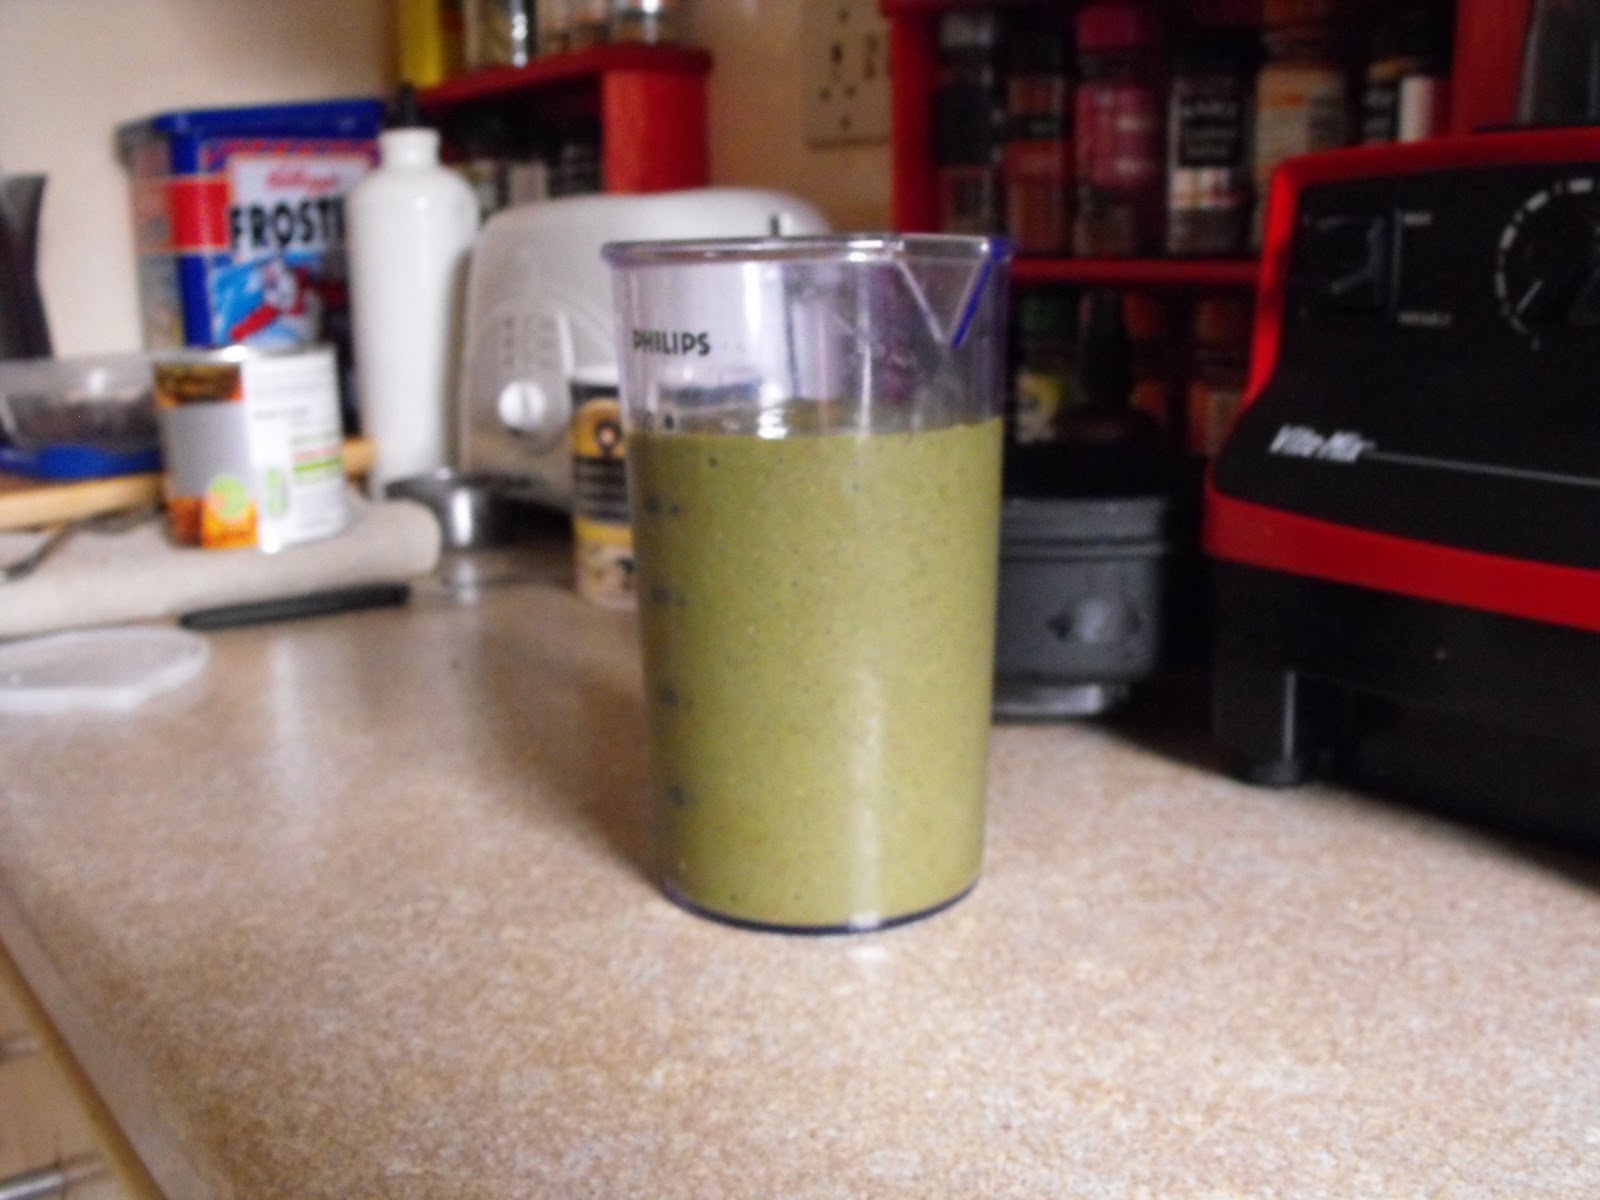
Puree until ice cream consistency. Then add 6 cookie dough balls that you’ve crumbled up and pulse to combine.

Then spoon into bowls (or parfait glasses if you want to be posh) and serve with one cookie dough ball on top for garnish.

It’s easy being green


A green smoothie is the way we start our day. It is a great way to get your 5 a day in one go so anything else you eat is bonus. We use our super powdered Vita-Mix blender to blend it silky smooth.

Here is what we do:
Pour in some cherry juice (cherries are very good for stiff and sore joints)
Throw in an apple, an orange and a banana. So far so good right?
Then add a couple of spoonfuls of hemp and flax  to add protein, fibre, calcium, iron and omega 3 and 6
Next a tsp of cinnamon (helps to balance blood sugar levels)
Then curly kale up to the top of the blender.


Whoa there. Did you say KALE? I did my friend. That is what makes it green. But I swear you can’t taste the kale. But why KALE? Because it is a super food mon ami. Kale is very high in beta carotene, vitamin K, vitamin C, lutein and rich in calcium.

Then you whiz all that up to make sure the kale is well blended and smooth so it looks like this:


Then we add some frozen fruit. This bit differs as to what we find on sale. This week it is:
 frozen strawberries
frozen pineapple
Ice
And blend again until it is cool and frosty.

Here’s our morning drink—it’s a bit of a greeny-brown in colour but so flavourful in taste. And good for you as well. Bottom’s up!


Excuses, excuses

OK, I’ve not been doing terribly well on the Vegan MOFO front. I’ve been hella busy at work and exhausted and forgetful and cranky and tearful (I forgot I had a lunch time club, went home to have a nap and then cried when all the kids told me they turned up to Poetry Club and I was not there) and my doctor thinks I am menopausal. Grand. I was taking pictures of all our lovely food but never managed (until today) to get it off the camera and onto the memory stick.  I’ve just been too shattered at night to bother. We’ve been listening to 2 episodes a night of a radio programme we like (That Mitchell and Webb Sound) and last night we were listening and I said, “Shall we listen to the second episode?” and Spiderman gave me the *look* and said, “That was the second episode. You've been asleep for a half an hour.” Oh dear.

So my apologies. Here are some special food posts to make up for being so shite.

Monday 10 October 2011

Beans and Rice

Another of those wacky PSAs from Saturday morning. If you thought the other sounded like School House Rock wait until you hear this one. This one is purely vegan.

Sunday 9 October 2011

Remember this?

All those who grew up in the 70s should recall these Public Service Announcements that aired on ABC between Saturday morning cartoons. This was one of my favourites--I made this many times, happily singing the song as I did. This is practically vegan if you sub soy yogurt for dairy. I never could get the grape to stay on top, however. Enjoy.

Saturday 8 October 2011

Magical Loaf Studio

This is what I did with the chickpeas that I cooked from scratch in the last post: 

Many people think (and rightly so) that the nut roast or lentil loaf is the staple of a vegan diet. I used to enjoy buying one that came in a packet and all you did was add cold water and it was amazingly good. We had it for every Christmas since we arrived in the UK. However, since my hysterectomy I have had to give up gluten and the 5th ingredient in the packet nut roast is wheat rusk. *SOB* so clearly that is out for this year. But never fear, Vegan Lunch Box is here! This blog has something called the Magical Loaf Studio where you choose a protein, a nut or seed, a carb, some vegetables, a binder and some seasonings and click the button and PRESTO! It spits out a recipe. This is the one we ate last night. Chickpea Cashew Roast. This was hella good and tasted just like thanksgiving stuffing--but not the kind your Uncle makes with way too much sage--the good kind.

Here’s the link if you want to have a go yourself making one. It really is addictive and there are endless combinations. Have a go--you know you wanna.
http://www.veganlunchbox.com/loaf_studio.html


Chickpea Cashew Roast
Ingredients:
1/2 cup cashews
2 TB olive oil
One onion, diced
One large garlic clove, minced
One large carrot, peeled and grated
2 cups cooked garbanzo beans, partly mashed
1 cup uncooked quick oatmeal or oat bran
1/4 to 1/2 cup vegetable broth, as needed
1 heaping TB flaxseed meal
1/4 tsp. dried thyme
1/2 tsp. dried sage
2 TB nutritional yeast flakes
Freshly ground black pepper, to taste
1 tsp. salt
Directions:
Preheat the oven to 175C/350F. Spray a loaf pan or 8x8 square baking pan with nonstick spray and set aside (an 8x8 pan makes a crisper loaf).
Grind the cashews into a coarse meal using a food processor or spice/coffee grinder. Place in a large mixing bowl and set aside.
Sauté any vegetables you've chosen in the olive oil until soft. Add to the large mixing bowl along with all the remaining ingredients. Mix and mash together well, adding only as much liquid as needed to create a soft, moist loaf that holds together and is not runny (you may not need to add any liquid if the grains and protein are very moist). Add more binder/carbohydrate as needed if the loaf seems too wet.
Press mixture into the prepared pan and bake for 45 minutes to 1 hour, or until cooked through.
Let the loaf cool in the pan for 10 to 15 minutes, then turn out onto a plate or platter and slice. Serve with potatoes, vegetables, and vegetarian gravy, if desired.
Cold leftover slices of make a great sandwich filling.

There were a few minor changes I made. I cut back on the oil.  I did half a carrot and half a red pepper because I felt like it. Instead of oatmeal I used millet flakes to make it totally gluten free.  I also cooked it in my pie pan and cooked it for 30 minutes at 190C/375F. This way I could cook broccoli as well. I cooked the Roast for 10 minutes, added the broccoli in a pan small enough to fit on the same oven rack as I only have one in my oven and cooked for a further 20. Check out that 20 minutes broccoli--all brown and crispy and yumilicious.

I served it with a drizzle of this recipe for Tahini Tamari Sauce (without the parsley but with added sriracha hot sauce for a bit of zing) http://viveleveganrecipes.blogspot.com/2007/07/tahini-sauces.html

It was a little crumbly as I cut it after 10 minutes because I was an impatient greedy guts. But the second slice was much firmer. Plus we had half the roast left over and so lunch is sorted tomorrow!

Scratch


I used to be a tinned bean sort of gal. It was convenient. You just open the tin, plop ‘em in a colander, give ’em a good rinse and shake and you’re sorted. This used to be Spiderman’s job as I struggle to use a tin opener (don’t ask.) But over time you start to look at how heavy they are to carry home from the shops--we are car free so you can only buy what you can carry. Or how the cheaper the tins, they smaller and grainier and mushier the beans seem. You think, “Hey ho, I guess that’s the price you pay if you want to save money.” You also start to look at how expensive they can be if you want to buy the nicer brands. Over here I can only find black beans in the more expensive brand which costs 99p a tin.

That’s why I decided to start cooking my own from scratch. A bag of dry black beans costs 99p and I can make about 6 tins worth. Now that is a savings. But I was afraid it would be too much faffing about--I’ve not got time for faffing. But it really isn’t all that complicated once you get into a rhythm.

First you need to decide how much you want to cook. My theory is cook more at one time at eat it over several meals as cooked beans will keeping the fridge for 4 days. Here is the chart I use:
1/3 cup dry=1 cup cooked
½ cup dry=1 ½ cups cooked
2/3 cups dry=2 cups cooked
1 cup dry=3 cups cooked
2 cups dry=6 cups cooked

You have to remember to start the night before because they need to soak. After forgetting several times at the beginning and all the while muttering under my breath as I stomp my way to   the shops to purchase a tin of beans I developed the sign system. I have a sign that I stick to the back of the front door so I see it before I got to bed. It says:
Don’t forget to soak the beans
Before you go to bed! 
Here’s how to cook beans from scratch:

1. Measure out my beans according to what you want to cook over the next few days and dump them  in a pot then fill the pot with cold water.
2. Put the lid on the pot and trot off to bed.
3.  In the morning let them keep on soaking while you’re at work
4. When you get home drain them and rinse them really well and wash  the pot. This rinses away all the starches that cause you to fart so much when you eat beans. Remember that old rhyme?
Beans, beans
Good for the heart
The more you eat
The more you fart
The more you fart
The better you feel
So eat some beans at every meal!
Well now you won’t  fart at all (or as much) because you’ve rinsed them.
5. Put the beans back in the pot and cover with cold water and bring to the boil.
6. Boil for 10 minutes. You may see some white scum floating on the top--you can scoop it off or as it simmers it will absorb itself back into the water.
7. Reduce heat and simmer until the beans are cooked to your liking.

Here is a handy dandy chart to tell you how long to cook each kind of bean courtesy of http://weblife.org/beanchart.html

Today I made a boatload of chickpeas to be eaten over the weekend. I soaked 1 2/3 cups so I would end up with 5 cups cooked. I used 2 cups tonight to make chickpea cashew roast (recipe to follow) and will use 3 cups Sunday to make Thai Roasted Chickpeas.

Here are my dry beans: Please admire my jar which is reused from the white vinegar I use for cleaning. What a good recycler I am. *pats self on back smugly*
Here are my beans after soaking about 15 hours.  You could probably soak less--the packet just says “over night” but this is what works for me.

It is well worth doing it from scratch if you want to save mega money as well as end the need for grainy, mushy beans laden with salt. Fresh ones genuinely taste so much better.
Wait until you see what I did with them!

Thursday 6 October 2011

These are a few of my favourite veg--sing along in your chirpiest Julie Andrews voice


Before last year’s vegan MOFO I would have said I disliked broccoli. Somehow last year we discovered tender stem broccoli and our world was turned upside down. It was more tender (duh!) and people said more like asparagus. The stems are slender and less woody and the florets not too chokingly flowery. But we discovered that best was to eat it was roasted.  I know. Who would have thought you could roast broccoli? But you can and it is glorious--all crispy like smoky broccoli potato crisps. Really. But there are some tips that will make it go from awesome to orgasmically good. I am reliably told this works with regular stuff, but I’ve only tried it with tender stem.

Tip 1
1. Cut your broccoli lengthwise in half or thirds. The thinner each piece is, the crispier it gets. FACT.

Tip 2
2. Don’t over do the oil. It needs a bit of oil. I tried it without and it just didn’t crisp up properly. But if you over oil they just feel oily and soggy after cooking. I have found that a good oil spray mister is a Godsend. It lightly distributes a fine layer of oil and with mine it takes 16 squirts to make a teaspoon of oil so you really get away with a lot less than you think. I would NOT recommend using something like PAM or FRYLIGHT which are non stick one calorie cooking sprays. They are full of chemical stuff to emulsify the oil and water and just succeed in making it all gummy and your pan a bee-otch to clean.

Tip 3
3. There are 2 temperatures you can use to roast your broccoli. For a long time I only did it for 10 minutes at 220C/425F. That is good. It works. But what if you have other things to roast as well? You can also do it at 200C/400F for 20 minutes and it comes out equally good--maybe a tad bit better. Just a shade more all over brown and crispy. If I have other veg to roast I cook them for 10 minutes, give them a stir and add the broccoli and cook for a further 20 minutes. Then all your veg comes out at once.

Tip 4
4. I like to add a few grinds of black pepper. I have been known to also squeeze a bit of lime juice over it before roasting as well if the rest of the food was similarly flavoured. It’s all good. Recipes I found online often say dust liberally with sea salt and a squeeze of lemon before serving, but I’ve never been inclined. It has a wonderful salty, smoky taste on its own and I think lemon after the fact might make it soggy. But I ain’t tried it, so I don’t know really.

Here are the pictures of my broccoli all bright and green--before going in the oven after the mist of oil and pepper:

Here is after 10 minutes of roasting at 220C/425F. Notice how brown bits are. Click on the photo to really see the lovely caramelised bits.

I know I said I thought 200C/400F was better but we were in a rush as Spiderman had to go back for parent’s evening. If I’d done it at 200C it would probably have been browner. But hey ho. It still tasted *amazing* and crispy.

Just so you know, we didn’t just have this. We had the leftover Moroccan bean stew as well.

Now go forth into the world and roast thy broccoli.  

Wednesday 5 October 2011

Roasty Toasty Vegetables


This is one of my favourite dinners--just pile lots of veg in a pan, add some olive oil, balsamic vinegar and Italian herbs and roast in the oven until all soft and caramelised and yum. Sometimes I serve it over spelt pasta (I cannot tolerate wheat but spelt in moderation is still ok with my tum) but this time I served it over quinoa which is an amazing grain (I think it is a seed actually-smacktually) that is a complete protein. So don’t let any annoying know-it-all omnivore tell you that have to eat meat or you won’t get all the essential amino acids (because meat is the only form of protein, right?) just smugly point them in the direction of quinoa. 

Roasty Toasty Vegetables

You need:
Some vegetables (duh!)
I used
4 tomatoes--I prefer to “de-goop” them but my mum would say that is crime
2 red peppers
1 white onion
1 red onion
If I can get fennel at the market I use that but sadly I was too late last week and they were sold out. *sob*
1 TB olive oil--garlic infused olive oil is particularly good
2 TB balsamic vinegar
Some dried herbs of your choice--I used basil, oregano and fennel seeds (because I can’t get enough of the aniseed-y goodness)
Extra added bonus: I added half a pack of chopped Taifun smoked tofu with almond and sesame that was hanging about my fridge. It is delicious and savoury and adds an almost umami flavour to dishes. Great for replaces salty things like goat’s cheese.

While you are cutting up the veg then preheat your oven to 200C/400F. Pile all the veg into a big roasting pan making sure it is all in one layer. Like this:

Then pop in the oven for 20 minutes, take it out and stir and then back in for 20 minutes. Now it looks like this:

Serve it over pasta or a grain of your choice. Doesn’t that look lovely?

We like to top it with “parmesan cheese.”  What? You cry. How is that possible? With the miracle of Nutritional Yeast, my friends. These cheesy flakes of goodness are delicious and contain no cheese at all. They are an inactive yeast grown on molasses and are chock full of B vitamins. They are the secret ingredient to give you that cheesy flavour your mouth craves with no suffering involved.

“Parmesan Cheese”
3 TB nutritional yeast, a.k.a. nooch, a.k.a vegan pixie dust
3 TB ground almonds-sometimes referred to as almond meal. Find it on the baking aisle, You could grind your own but the almonds would need to be blanched beforehand and the skins slipped off and who has time for all the faffing about? Just go buy some almond meal, ok?
½ tsp sea salt, smoked sea salt of you can get it. 

What to do:
Grind it all up in a food processor or mini chopper. Store in the fridge. It reminds me of  the Kraft cheese of my youth that came in the green shaker container.

I love the way the parmesan looks on top of the dish. I would like to say it looks like a dusting of yellow snow, but clearly that has an unpleasant connotation to it so let’s not go there. Maybe a dusting of pollen--that is how I recall pollen looking in Louisiana so maybe that is more accurate. Ok, enough of these similes--just say what it looks like.

It looks delicious.

Tuesday 4 October 2011

Moroccan Bean Stew with Sweet Potatoes and Roasted Apricots

 
This delicious soup is adapted from a recipe from my favourite cookbook author Dreena Burton. Here is the link to her blog if you want to check it out yourself. http://vivelevegan.blogspot.com/2010/02/moroccan-bean-stew.html

Moroccan spices are some of my favourite--warm and aromatic they make food taste and smell amazing.

Moroccan Bean Stew with Sweet Potatoes and Roasted Apricots
You need:
Up to 1 TB oil (I use less)
1 tsp cumin seeds
¾ tsp ground cumin
1 ½ tsp cinnamon
1 tsp ground coriander (cilantro to my American peeps)
1 tsp fennel seeds
1 tsp dried basil
½ tsp sea salt
1-2 tsp sriracha hot sauce or a ½ tsp cayenne pepper
Fresh ground pepper to taste
1 ½ cups onion, diced
3-4 cloves garlic, minced or grated
3 to 3 ½  cups sweet potato, peeled and diced
1 red pepper, diced
1 can (1 ½ cups) black beans, drained and rinsed well
1 can (1 ½ cups) chickpeas, drained and rinsed well
 1 cup dried red lentils, rinsed and picked over
3 cups vegetable stock
3 ½ cups water
1 ½ TB freshly grated ginger --I cheat and blop in some BART Ginger Paste

Optional topping (it’s not optional--this is what makes it *amazing*)
½ -¾ cup dried figs or dried apricots--I’m using apricots she uses figs
½ -1 tsp oil
Pinch sea salt

How to do it:
In a large pot over medium heat add the oil and the spices and the salt. Cook for a few minutes then add the onion, pepper, garlic and sweet potato. Stir though and cover and cook 7-8 minutes until the onions have started to soften. Add all remaining ingredients except apricots and bring to the boil. Once boiling reduce heat and simmer until lentils are fully dissolved. Note: she says if you are using fresh ginger put it in at the end and stir through as I always cheat and use ginger paste I put it in for the whole time. Do what you like.

While the soup is cooking preheat the oven to 220C/425F. Line a small pan with parchment paper and toss the dried fruit with oil and salt. Bake 12-15 minutes, tossing once. Remove and let cool. They may be blackened in spots but they taste gloriously smoky and sweet. They also get chewier and crispier as they cool. Bonus!
Before:

After:

Check this out --doesn’t it look delicious? All those smoky apricots a-swimming in the golden soup? Did I mention this makes more than enough for 2 meals? Yup--it’s a make once eat twice sorta dish. 

Note: I have come to be cooking my own beans from scratch to save money but also to control the salt in processed beans. This time I tried to cook the beans in the same pot as they were going in the same soup. This made my black beans a little soft--but hey it is a soup they don’t need to be too firm but stained my chickpeas a weird purple-y blue--like the colour of a cloud right before it rains. Which I am reliably told is the colour of Krishna. So if my soup has a slightly strange hue, don’t worry--it still tasted wonderful.

We interupt this food network programme for an important news bulletin

People, we have British passports. As I have mentioned before, we bought our plane tickets thinking we could fly on our US passports only to find having 2 nationalities meant twice the fun--2 passports required. It has been a headache and quite stressful as both myself and Spiderman are tighter than a clam named Scrooge when it comes to forking over money for stuff we don't think we should have to. I mean, who needs 2 when 1 will do, right?  But since the embassy told us to, we have followed orders. Then there was the stress of filling out forms by writing in all CAPITALS in tiny boxes which is a recipe for disaster with me. Then forking out more moo-la for professional photos as ours weren't good enough, apparently. The backgrounds were "too cream." Then my photo was rejected for wearing a hat and we had to appeal and send a letter explaining how the hat is for religious reasons and finally we had to have to big scary interview which happened to be in another town entirely and cost us £11.20 for the bus. Unbelievable.

But it was all worth it. When the envelopes came today I was shaking like a leaf in a hurricane. We were told that within 1 week we'd hear if we were approved and within 2 receive the passports (if we passed) so I was expecting just a letter. When I opened the rather bulky envelopes, what should fall out? A passport just for me (and another for my sweetie) plus an organ donor form--I suppose now that we can travel if we were met by some untimely accident on our journey at least our organs would be used for the greater good.

So hoorah and lashings of ginger beer and all that cliche rot. I am thankful and grateful and give the full credit to God who hurried it along despite the earlier bumps in the road. And just like in A Christmas Carol--"The Spirits have done it all in one night. They can do anything they like. Of course they can. Of course they can."
Now back to your regularly scheduled cooking programme!

Monday 3 October 2011

Bombay Tofu with millet, mango and roasted vegetables


Youve pressed your tofu, now what do you do? Marinate with this delicious paste!

Bombay tofu

6 tsp mango chutney--we like Geetas mango and chilli chutney
1 tsp ground tumeric--this stuff stains everything a nice shade of yellow so be careful
2 tsp ground coriander (cilantro to my American peeps)
2 tsp ginger I cheat and use BART ginger paste
2 tsp garam masala--I actually used Ras El Hanout which is basically garam masala but with dried ground up rose petals added

Preheat your oven to 200C/400F

Smear each piece of tofu with the paste leaving a bit back for the flip over.
Lay it in a pan on a bit of parchment paper and add what ever vegetables you want to the side.

We only have one oven rack so I have to put everything in the same pan. If you have a normal oven then please feel free to use 2 pans.

Here is what it looks like all squeezed up in one pan:

Thats the tofu then half a red pepper and some tender stem broccoli. I drizzled a bit of oil on the veg then squeezed the juice of half a lime over it and then ground masses of black pepper onto it.

Bake for 10 minutes then flip tofu and smear on the remainder of the marinade  and bake for 10 more.
Isnt that gorgeous???

Serve with millet and fresh mango chunks. I chose millet as it is very high in iron, gluten free and yum. It has a nutty sweet flava that I thought would compliment the tofu.

The mango I scored at the market for £1 and was as big as a babys head. I kid you not. If babys heads really were made out of mangos I would *definitely* be a zombie.

Enjoy!

Sunday 2 October 2011

The Importance of Pressing Tofu by Oscar Wilde


Ok, he didnt exactly write that, but he should have. I used to be in the just blot it and it will be fine camp but I have definitely moved over into the press then marinate camp.

Tofu is water packed and so absorbs water. Duh. That seems obvious. I used to just blot off the excess and then marinate but sometimes the marinade didnt seem to soak in as much as I would have liked --even after marinating for several hours. So I tried pressing and was amazed at much drier the tofu felt (duh!) and how easily it cut and didnt crumble like it did straight out of the packet.

Some people freeze their tofu, then thaw, then press to give it a more meat like chewy texture. Im not really into things that have the mouth feel of meat so just pressing is all I need to do.

How to press your tofu:
You need
1. Some tofu (duh!) I use 200g packets of Taifun tofu as my fu of choice
2. Something clean to wrap it in (I use tie dyed bandanas cos Im hippy like that)
3. Something flat to lay on top--a skillet works well
4. Something heavy to lay on top of the flat thing

Disclaimer: After mentioning my erstwhile assistant in the last post,  it was pointed out by said assistant that *maybe* I should learn to use the camera myself. Hes right. I will always be a sheep and letting someone do the tricky bits until I am required to be the shepherd. So if any of the pix are wonky--blame me.

Open your packet of tofu and carefully shake off as much moisture as you can and wrap it in your clean cloth. This picture is a bit washed out as I didn’t know how to use the flash yet.

Lay something flat on top. You could use your skillet, but I use this Welsh slate trivet with a hedgehog on it. Too cute!

Lay something heavy on top and go away for 15 minutes. I use an unopened carton of chocolate Oatly as we always have extras hoarded away for fear of running out of the stuff.

Come back and unwrap your now wet cloth and put on a second clean, dry cloth and cover with the flat thing and heavy thing and go away for 15 more minutes.
(I forgot to get a pictures of this step, but honestly I am sure you are clever enough to picture it in your head, right?)

Thats it! Unwrap your fu and it is dry and ready to slice and marinate.

Stay tuned until tomorrow when I show you the recipe for Bombay Tofu!!!

Vegan MoFo


It's that time again ladies and jellyspoons! I will be trying to take part in Vegan MoFo and post recipes and pictures of the good stuff we are eating! I know we'll be away for some of the month but I'll do my best to get some food stuff up and running soon. With my grumpy trusty photographer Spiderman by my side we'll show you some of the awesomeness it is to be a vegan.

Wanna know more? Click here:  http://www.veganmofo.com/

Now I just need to get batteries for the camera.

Identity

Who are you? How do you decide who you are? Is it what you do for a living? Is it how you are known in the community? Is it because you have famous parents? What determines how you see yourself?

For a long time I was known as the daughter of 2 very famous and influential local teachers. People were always coming up to me and saying how my mum taught them in junior high and they could still recite some obscure interesting bit of trivia because of her or how my dad was so influential in helping them see the world as more global than local. I enjoyed that because I had the privilege of having both my parents as me teachers (junior high and college respectively) and I agree, they were two of the best damn teachers I ever had. I became a teacher because of them. I loved being known as a teacher.

I had majored in drama and so was well known throughout my town as someone who had been in lots of plays. I liked having a high profile and having people stop me and say how much they enjoyed my performance. I met one of my dearest friends that way--the elderly wife of an ancient professor--and we wrote many letters to each other about our favourite poems and the meaning of life. I liked being known as an actress.

When I got married I decided to keep my family name as I did not want others to not recognise me as Spidergrrl, actress and daughter of famous teachers. I liked being who I was and changing my name seemed wrong somehow like I would be losing a bit of myself. Sometimes I wish we could present a more united front with the same last name as it might make it easier and people would stop assuming we weren't actually married, but Spiderman says we don't need the same name to unite us. All we need is a &. I adore being known as a wife.

When I quit teaching after my break down from grief and stress following the death of my beloved father, I often felt I had lost my identity. I could no longer say I was a teacher and the painful memory of being the daughter of a teacher who would never be able to influence a new generation of people was almost unbearable.

Today I know who I am. I am that funny dressed woman who works in a school. All sorts of people know me as my clothes are fairly distinctive. I am approached fairly regularly by strangers who want to ask me questions about myself or ask if I will pray for them. And while I have chosen to be a teaching assistant here in the UK I still feel like a teacher. Because what is a teacher? Someone who makes a difference in the lives of children. Someone who listens and cares when no one else seems to. Someone who helps you become a better human being--through education or citizenship. I do all those things and more. What I don't do is paperwork, fill in forms, measure growth by unrealistic expectations. I just love and help and make it better.

As many of you know, we are making a quick trip back to the US soon to visit family who are unwell. After purchasing our plane tickets we discovered that having dual citizenship meant we needed dual passports. Joy.  I never felt strongly about being an American, but I feel proud and honoured to be British. But my identity is both, inextricably twined together. So we've been rushing around trying to secure British passports. It has been a roller coaster of a time as my application was originally rejected due to me wearing a head covering in the photo. After sending a letter explaining that I do wear a head covering for religious reasons my application was approved and we were onto the next step. So I guess that is another part of my identity--I am a Quaker and religious woman who prays on her knees twice a day.

 Yesterday we had our "Identity Interview" which all first time applicants must go through. It is a rigorous 30 minute session where you are asked lots of questions about your background that supposedly only you would know. It was really scary as several things I was not completely sure of but tried to be honest and say what I could. And if you can't trust a Quaker, who can you trust? I won't reveal any questions because then you'll know how to steal my identity! But we both think it went well and hope to receive British passports soon.

But having to defend my identity made me think--who am I really?
A daughter
A dramatic actress
A wife
A teacher
A Quaker
An arachnophile
A vegan
A musician
A friend

Who are you?