Showing posts with label cheap. Show all posts

Wednesday, 3 May 2023

The Hiss-tory of Medusa

 Hello lovelies! 

I have been wanting to make a Medusa costume for years. Even though she can turn people to stone by looking into their eyes I believe she is a tragic figure. I mean, she didn’t start off all snaky, did she? No. She was raped by Poseidon in the temple of Athena and Athena punished her by making her hideous and so that no man could ever love her. Victim blaming much?

To start this costume, I needed some snakes. I started going around to charity shops to see if there were any rubber snakes about. Carmarthen Free Books gave me one they had been hiding around the shop to scare each other (which made me laugh as that was one of the many games that Spiderman and I played). A few friends posted me some rubber snakes they found in their house. A lovely customer came by with a few (and then a few days later a few more). I bought a packet of small ones from Amazon. Now we were set!

Most of the tutorials I found had them attached to a hair band. I was worried that would be unsteady and slide off every time I looked down. I planned to wear it at work and hopefully to Swansea Comic Con so it needed to be comfortable and stable.


I decided to build a bespoke crown to the shape of my head with support straps over the top. I bought 2 dog leads from Poundland (£2 each—when did Poundland stop selling everything for a £1??) and created a base.


Then I used some tiara bits I got at Poundland for £1 and used hot glue and wire to attach to the sides to give the snakes some scaffolding to hold onto.

front

Then I started draping the snakes and using hot glue and wire to keep them in place.

back
Next I had to wait until it stopped raining to go outside and spray paint them gold! My friendly customer also gave me a huge heavy snake which works perfect as a necklace.

I am really pleased with the results. My only issue is that it is a bit heavier than I intended. It weighs about 500g (a little over a lb/pound!) but luckily it sits very well balanced on my head. I added strips of black felt in the inside so any wires wouldn’t poke my head. I also decided to wear the black chiffon scarf under it to give the illusion of long hair but also be able to hide any padding I might hide under the crown.

VERDICT: I *love* the way it looks but it was very heavy. I don't think it will suitable for Comic Con but it definitely works for one Saturday a year dressing up at work. I think I just got carried away adding snakes, but I am very proud of how it turned out. 

Friday, 10 March 2023

I made a Thing

 Hello lovelies! My life has been really busy at the moment with some good and some bad things, but one of the good things is that I have been able to make some incredible crafts for various costumes for work. 

I am working on a Wednesday Addams costume to wear to work on our dress up Saturdays. I managed to find all the clothing  at local charity shops and then I ordered a wig from EBAY. But I really wanted a Thing hand to use as a prop in the photo shoot. However looking online they were hella-expensive. Like between £30 and £60 and I was NOT gonna pay that just for a quick prop.

So what is a crafty Spidergrrl to do but make one herself.


Is it perfect? No. But is it pretty good? yeah. 

So how did I make it? 

First I bought a pair of tan PU leather (meaning not from animals) gloves from EBAY for £2.99.


Then I drew on them in red sharpie where I wanted the scars to be be. While the ink was wet I smudged it with my finger to make the lines blurry.


Then I used black embroidery floss to stitch it up. I had to cut the glove down the side to be able to reach all the places on the back of the hand, but that was fine. I just stitched up the side when I was done.

Next I added some wire into a disposable glove. I put wire in all the fingers and then taped it down at the wrist. Then I carefully inserted the wired glove into the Thing glove. This was so Thing's fingers could bend. I taped a few wires on the other side of the glove to help the wrist be able to move a bit more when it was done.


Then I filled the wired glove inside the Thing glove with uncooked rice. This was to weigh it down and make it heavy but also keep it flexible. It took ages as I could only do a few spoonfuls at a time and had to use a pencil to push rice all the way into each finger. 


Next I hot glued a circle of cardboard with little fold up flaps to stick it to the sides of the glove to keep the rice from falling out and keep the wrist from collapsing. I forgot to take a photo of this so you will just have to use your imagination.

Lastly I used the Thing to trace a circle the same size as the open top from the other glove, cut it out and sewed it to the open top to close off the wrist. I decided it needed fingernails so I used a brown sharpie to draw some dirty nails and then smudged the wet ink.

And voila!


It doesn't have a huge amount of flexibility, but it has enough to do what I wanted. The fingers bend down, the wrist bends up. It looks quite good and  I spent about £3 and two hours to make it which sure beats £30-£60. 

I plan to wear the Wednesday Addams costume sometime in May when the weather is warmer as it isn't the sort of costume that can fit a lot of layers underneath. Watch this space! 

Wednesday, 8 February 2023

Quick Curried Potatoes with Roasted Broccoli

Hello lovelies. I mentioned on Facebook that my friend had gotten us both a Spice Advent Calendar and so I was looking back at recipes that might be good with certain spices. Lots of these spice combinations definitely have a curry sort of feel to them, so there will be lots of curry variations in the near future which is a-okay with me.

I remembered this recipe as one that Spiderman and I ate often. It involved boiled potatoes which were then cooked in a variety of things like spices, ginger and garlic, peanuts, sesame seeds and desiccated coconut, plus a tin of chickpeas to make it a meal. I realised I hadn’t eaten it since Spiderman died because I wasn’t sure if the potatoes would hold up with a reheating. I somehow had it in my head they would be mushy on day two, but they were not. A teency bit softer perhaps, but not turning into mash. And they were a doddle to reheat in the 5 minutes it took the broccoli to crisp up in the air fryer.

The beauty of doing this recipe with a friend is we both just used what we had—so I had little new potatoes which do hold their shape a bit better, but she had larger old crop potatoes which were a bit softer, but still good. I used chickpeas but she used butterbeans as that is what she had in her cupboard. She also realised that she was out of both coconut and sesame seeds at the last minute, but she reported that it was still delicious. So if you don’t have it, don’t sweat it.

If you want to read the original recipe go {HERE}

The spice that we used was basically about a Tablespoon of curry power which contained things like turmeric, ginger, cumin, coriander etc so feel free to do it like the original recipe or just use curry powder.


Quick Curried Potatoes with Roasted Broccoli

You need:

400 grams new potatoes, diced

Boil these in a pot of water until they can be pierced with a knife. It won’t take long. Meanwhile get your other ingredients in place.  Don’t roll your eyes at the thought of lots of little containers. It will make the next step go so much easier if you can just dump and go.

The other ingredients:

1 tin chickpeas, drained and rinsed

Container 1:

1 tsp cumin seeds

1 tsp chili flakes if your curry powder is mild

1 TB finely chopped ginger-root

Container 2:

3-4 cloves garlic, crushed

Container 3:

1 TB curry powder (or the spices from THIS recipe)

¼ cup roasted salted peanuts

1 TB sesame seeds

1 tsp sea salt (if your curry powder doesn’t contain it)

Lots of black pepper to taste

To do:

When the potatoes are nearly done heat 1 TB oil in a different large pan. Drain the potatoes and reserve them over to the side.

When the oil is hot, add container one and cook for a minute stirring constantly. Then add container 2 and cook the garlic for another minute stirring constantly. Then add the potatoes and chickpeas and container 3 and cook for another few minutes stirring constantly until everything is hot and the potatoes are coated with the spice mix. If it starts to stick, then add a tiny splash of water.

Serve with something green on the side. I used broccoli I roasted 5 minutes at 200C/400F in the air fryer and my friend used steamed frozen broccoli. Do what you have. A handful or frozen peas into the boiling potato water would also work.

Today and tomorrow
This was delicious both days and quick to make and quick to reheat. I will definitely eat it again and I cannot believe I waited nearly two years (because it has been nearly two years since I lost my Best Beloved) to eat it again.

Wednesday, 1 February 2023

Make-It-Up-As-You-Go-Along Cream Sauce Paste with Roasted Broccoli and optional falafel

Hello lovelies! Last week I shared a recipe that used half a tin of cannellini beans. Which then makes a person think, “Now what do I do with other half of the tin?” When you live alone there is quite a lot of coming up with something to do with other half of a tin of beans. Should I just eat the same thing that I did the night before? Well, I could but I had already frozen the rest of the olive tapenade. Plus, I was out of both kale and sun-dried tomatoes. I did want to eat pasta because that is what I had (all potatoes had been used up earlier in the week) so I had to put on my thinking cap.

I stopped by M&S on the way home and grabbed a broccoli (cheapest place to get broccoli without plastic packaging) and planned a recipe in my head on the walk home from the shop.

In the end I made a sort of lemony cream sauce which was delicious, but it made much more than I was expecting so my pasta was a bit on the saucy side. Next time I will make a full batch using a whole tin of beans and freeze half and eat the other half over 2 nights. I can just vary the herbs (Za’atar instead of mixed herbs) or change up the vegetables or do one night over pasta and one night over potatoes.

Make-It-Up-As-You-Go-Along Cream Sauce Paste with Roasted Broccoli and optional falafel


The veg I used were:

1 onion

Handful of chopped red pepper (I chop a pepper at the start of the week and keep it in a container in the fridge to just throw in however much I want into meals that week)

A bit of carrot (I was slicing a carrot to feed the Bronte Snails and I just cut some of it into matchsticks.)

Cook this in a large pan with either a splash of water or oil

Make your sauce then let it simmer with your veg:

Half a tin white beans

¾ cup unsweetened non-dairy milk (I used soya milk)

1 TB tahini

Juice of one lemon

3 TB nutritional yeast flakes

Whiz all that in a blender until smooth then throw into your veg pot to simmer.

Do your pasta:

Measure out your pasta (I used 1 cup GF pasta) and put your water on to boil in a second pot. When the water starts to boil add your pasta and cook as the package recommends.

Optional sides:

I was lucky enough to be gifted with an air fryer, so I just threw in some broccoli misted with oil and sprinkled with garlic powder in at 200C/400F for five minutes, stopping after two minutes to toss in a few falafel that I had in the fridge that needed to be eaten. If you are not lucky enough to have this wonderous contraption, then start with this first. Preheat your oven to 200C/400F and roast broccoli for 20 minutes until lightly charred. While it is roasting, cook your veg, make your sauce and boil your pasta.

The air fryer is genius because it cooks so quickly and you don’t have to turn on the oven just for one person so it really helps with cooking for one. Save up for one because they are totally worth it.

When the pasta is done, drain it and add it to the hot sauce. Top with your broccoli and falafel if you have some.  Like I said, I think this could have used double the amount of pasta in there and still felt saucy. So, if you are cooking for two this still would work. If you don’t have any broccoli or don’t want to turn on your oven throw a handful or 2 of frozen peas in the boiling pasta water so you get something green in you.

Wednesday, 25 January 2023

What I Ate Wednesday--Tapenade Pasta with Kale and White Beans

 Hello lovelies. It has been two years since I blogged about food, mostly because when Spiderman died my eating habits changed. It is harder to cook for one person when what you want to be doing is cooking for two people. It has taken me two years to be able to write What I Ate Wednesday instead of What WE Ate Wednesday.  

After he died I was exhausted mentally and physically. I struggled with meal planning. Do I make something BIG and eat it all week? No, I have discovered that two nights in a row is about my limit. Unless it's nachos, then that can go three nights in a row because nachos. More on them in a few weeks.  But the act of cooking something fresh from scratch for one exhausted and sad person night after night was often too much. But these days I have things figured out.

These days I do a lot of small preps so that cooking from scratch goes easier. I plan to talk about these tips in the future. Today was one of those small prep days. 

I haven't eaten Black Olive and Walnut Tapenade since Spiderman died. It was always one that I made in HUGE amounts and filled our freezer with jars for an easy Saturday night dinner. A friend mentioned it to me that she loved my recipe and made it all the time and I suddenly thought, "Why I am I not making it all the time either?" 

And so I did. But instead of making insane amounts because my freezer is full up and being one person it will take me twice as long to get through the jars, I made a regular sort of amount. I saved up smaller jars that would have enough for one person servings, but of course if you are feeding more people you can freeze in larger portions like I used to. Also I changed up the way I used to do it. We always served it with roasted cherry tomatoes, but these are a bit pricy and I just can't be arsed to heat up my oven for 15 minutes just for one person so I just bunged in some oil packed sun dried tomatoes. I always keep these on hand in the fridge as they add a pop of flavour with little effort. Plus a jar costs about the same as a punnet of cherry tomatoes and I can get several meals out of one jar. 

We used to always serve it with kale and I still do. This time I added half a tin of cannellini beans just to make it more filling. I will use the other half of the tin of beans in another, slightly different pasta recipe tomorrow.


Tapenade Pasta with Kale and White Beans

First make your tapenade. You need:

1.5 cups black olives (this was a 330g /163g drained weight jar)

1/2 cup walnuts

4-5 cloves chopped garlic

2TB olive oil

Throw everything but the oil in a food processor and pulse until crumbly, then add the oil and pulse again a few times and divide into jars.

You need half a cup of the tapenade per serving. This made enough for me to have three pastas and one pizza (it made 1.5 cups plus 1/3 cup so I plan to use the jar with less on a pizza.) I labelled three of the jars and popped them in the freezer.


To make the rest of it:

This is obviously just for one person so feel free to double it. 

50g or thereabouts  of curly kale (3-4 massive handfuls)

half a tin white beans, drained

juice of half a lemon

more garlic

3 TB nutritional yeast flakes for a cheesy flavour

3-4 oil packed sun dried tomatoes, snipped into bits

half a cup tapenade

No need for salt because of the olives, but lots of black pepper

3/4-1 cup (GF) pasta of choice

Boil a pot of water for the pasta. I like to use water from a boiled kettle to speed things along. You can add a bit of salt or a stock cube to the pasta water if you like. When it is boiling, add the pasta and boil for however long the package says. 

Meanwhile, throw all the other ingredients into a Hugh Jass pot and cook with about 1/4 cup of the pasta water until the kale turns bright green and softens. 

Add the cooked and drained pasta to the veg mix. Eat.

If you have the tapenade already done this comes together in 20 minutes or less. 

Plus you have extras for future meals. Which is a life saver for when you are tired and need something healthy, cheap and fast. 

Tuesday, 1 September 2020

What We Ate Wednesday--Easy Peasy Curry

 Hello lovelies! I cannot believe I have never written about this. I was sure I had. But I searched all the the key word combinations I could and I never found it. It may be there but it is deeply buried, so I thought I would resurrect it.

We eat this curry a lot because it is cheap and easy and makes enough for about 6 bowls if you serve it with brown rice. Curry paste makes it happen in a snap. The original recipe was something I found in a free magazine from Waitrose...it may have been a Jamie Oliver recipe. It definitely used Balti curry paste, but now we just chuck in whatever curry paste we have on hand. It's all good. This curry is very forgiving. 


Easy Peasy Curry

1 onion, diced

half a red pepper, diced

garlic

1 TB chopped ginger root

1 tin chickpeas, drained and rinsed

1 tin tomatoes

4 TB curry paste

600g potatoes, cubed

200g (about 2 heaping cups) frozen peas, run under hot water to take the ice off

brown rice to serve

1. Chop the potatoes and boil them until easily pierced by a knife, Drain and reserve.

2. Meanwhile in another large pot, cook the onion and garlic and ginger in a splash of oil or vegetable stock until softened. Add the chickpeas, tinned tomatoes and curry paste and turn up the heat and when it starts to bubble turn the heat back down and simmer with the lid on, stirring occasionally. 

3. When the rice is nearly done, add the potatoes and defrosted peas to the curry and heat until piping hot. Taste for salt and pepper. Serve over rice.

That is literally it. We have it the first night with rice and the second night with cream-style corn which you can either buy in a tin or whack some sweetcorn and milk in a blender and make. 

Wednesday, 26 August 2020

Crafty Corner--my new phone holder

 Hello lovelies! I have been crafting like crazy lately, thanks to my friend Kirsty who found me several huge bags of curtains, duvet covers and sheets for fabric. It has inspired me to finally get in there and reorganise my craft room for easier project making. I bought several hugh-jass clear storage tubs at B&M Bargains for all my new fabric and I found all kinds of stuff I didn't even remember I had.

I have been working with clay, painting rocks and sewing this week after work and it feels great.

During lockdown I noticed that my phone case was beginning to go. I knew I wanted to craft a replacement but wasn't sure how to do it. While I was home with no place to go, I watched dozens of tutorials about how people made phone cases.

I had a great idea to make a little slip in envelope sort of case made from a men's necktie which was absolutely adorable, but extremely impracticable. I am a butterfingers. There is a reason i have the sort of case that is like a little book with a front cover because I drop my phone ALL THE TIME. I tried sewing a little pocket one and promptly dropped my slippery as an eel phone the moment I tried to get it out of its cute little envelope. I decided it would made a cute i-pod holder instead. 

So I began to look at only tutorials for the flip case style. This is what I found.

Some were paper--a terrible idea in wet Wales.

Some were cloth with cardboard inside for stiffness--also a bad idea in the country that never seems to stop raining.

Most were just glued together/no sew--I wanted to do a combination of sewing with a bit of gluing.

Some had little tiny strips of elastic in the corners to precariously hold your phone in--yeah, that is an accident waiting to happen.

Finally, I was allowed to go back to work and I just put up with my slightly raggedy phone case while i pondered and schemed. Finally--as so many good ideas do---it came to me in a dream.

Not a crack-ass dream but a craft-ass dream. I could use the little snap-in case that sits in the book part of the case and craft around it. No precariously placed strips of flimsy elastic for me! I could sew a cover and cut a little peephole for the camera. I could fill it with a bit of a soft old blanket to give it some padding and then instead of cardboard, I could use some craft foam that I found in my clean up. It would give it some flexible, waterproof stability.

I dug out this pretty fabric that came from a  sort of Indian-print throw and started planning. I added iron on interfacing for stiffness and used my phone case as a tracing pattern. I debated about adding little pockets but 1) that would be a faff and 2) I never really used them on my old phone case. 

I decided to add the classic button and elastic clasp because it is easy to make and looks nice. Who doesn't love a big decorative button??? 

Here it is: Ta-da!


 In the inside after sewing, I hot glued the slip-in case from my old phone case because it was still in good condition.


Now, here it is with the phone in--I really need to clean my screen. Also, this would be a good time to mention that is is impossible to take a photo of your phone with your phone. I had to resort to the camera and then tediously download it and edit it on the computer. My phone makes taking pictures so much easier!


I also closed it with a very nice rolled edge that I hand sewed. 

Now from the back--peek-a-boo! 


I am really proud of it...it is beautiful and hand made and exactly like how it was in the dream. It is soft to cushion the inevitable falls and when it wears out I will be able to make another one. I love that it is made from upcycled materials and it cost me nothing to make. 

Hoorah for crazy crafts! 

Saturday, 27 June 2020

Schrodinger's Birthday

Hello lovelies! Today is my UN-BIRTHDAY. My mum's birthday was yesterday and my dad's (heavenly) birthday will be tomorrow. As a child it was very hard to have a December birthday when everyone else in your household had a birthday right at the same time, so the day in between was declared my un-birthday like in Alice in Wonderland.

Spiderman likes to pretend this is not a real holiday, but it totally is. Every year we laugh about it being Schrodinger's birthday--the holiday that is and is not simultaneously happening. Every year he makes a big production of saying in a pantomime gesture behind his hand to an invisible audience that it is not real and I am talking nonsense, but every year I get a gift--so who's laughing now? 

This year I was stunned by not only the gift, but the grand gesture of remembering something I had vaguely mentioned a few weeks ago but also of finding a whopping great bargain. Because i do love a bargain.

Spiderman is great at this sort of thing. He listens and makes a mental note and then surprises me with something personal and meaningful and I run around in a little circle flapping my hands out of joy. 

Fairy Tales are important to me. I write a blog about them every Friday. I published a whole book of them last year. I love illustration. I just made an altered book with 60 illustrations during lockdown. I made a companion art exhibit to go with my book launch last year. Shaun Tan just won the Greenaway award for best illustrations in a children's book. His book The Singing Bones was a huge influence on me when I was making the companion art for my book Wounds: New Openings Into Old Stories. I checked it out of the library half a dozen times while I was creating my artwork.

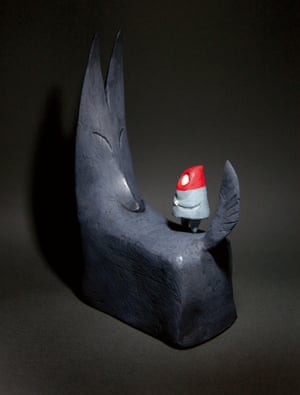
He created lots of grotesquely beautiful sculptures and then photographed them and I love the juxtaposition of them all.  

When Shaun Tan won the Greenaway, I said to Spiderman I wish I had that book. I regretted not ever buying me a copy. Spiderman said--in that casual dismissive way he does that I fall for every time--"Well, the one we should have gotten you was the collector's edition in the slipcover with the two signed prints, but it is too late now as it was a limited edition." 

I sighed and agreed. Plus it was really expensive, I told myself.  

Well it turns out that that was a big ole lie. Because yesterday, what should arrive in the post but the limited edition of The Singing Bones that he found on a clearance sale at 30% of the original price. 


And you want to see what is cool? The clasps on either side are in the shape of bones that you thread through ribbons. 

 
Here are my two prints signed by Shaun Tan. You can't see the signatures in the photo, but they are both signed.


I love this book because it features some very familiar tales like these:
Grimm fairytales you can touch: The Singing Bones by Shaun Tan ...
Red Riding Hood

Grimm fairytales you can touch: The Singing Bones by Shaun Tan ...
Rapunzel

Also lesser know tales like these:
Monday Reading] Lesser Known Grimm(er) Fairy Tales Especially ...
Mother Trudy

The Singing Bones by Shaun Tan
Foundling

I love it so much. Thank you Amazing Spiderman! Even as you handed it over saying this was definitely NOT for my un-birthday as that holiday does not exist I saw your sly wink and that twinkle you get as you saw how happy I was with my un-birthday gift. Thanks, best beloved. 

Wednesday, 3 October 2018

What We Ate Wednesday--Cocoa Coconut "Nung" Balls

Hello lovelies! This is one of those copycat recipes. It's Not Quite made like the original (but tastes just like it), but I just used what I had on hand to make them.

I try really hard not to buy single serve snacks in non-recyclable wrappers. But the other day I had been out and about running errands and I was out much longer then i meant to be and I started to go all funny.

I am hypoglycemic so when I go funny:

  • My vision goes all wibbly
  •  I feel extremely tired
  • I feel dizzy
  • I can actually see the energy slowly drain out of my body  like the water from a kiddie pool
I also get HANGRY (hungry + angry) so this is not a good combination. I was loaded down with library books and and a kilogram bag of rice flour and half a kilo head of broccoli and I suddenly needed a bit of food and a sit down. 

I popped into our local Health Food Shop Aardvark Alternatives and bought one of these for 99p. 
Nākd Cocoa Coconut
I had never tried this flavour, but it was really good. I sat down on a bench and ate my Nakd Bar and pondered on the ingredients as my energy level rose like the mercury in a hot thermometer. I *knew* I could make this at home. 

Now I have made little LITTLE CHOCOLATE BROWNIE BITES rolled in coconut, but these had the coconut inside. 

I went home, unpacked all my bags and got to work.

Now their recipe used dates, raisins, coconut, cocoa powder and cashews. I didn't have raisins or cashews on hand, so i used all dates and (GF) oats. 

They taste *exactly* like the Nakd bar, but in reality they look like little DUNG BALLS. Seriously, like the sort of ball the ancient Egyptians believed was rolled across the sky to be the sun by the solar deity Khepri. 

That is why there are no photos of this delicious treat as I don't want to put you off. 

I have called them NUNG BALLS because they are Not Dung balls, ya dig? 

Nung Balls
3/4 cup dates soaked in warm water for about 20 minutes then drained (save the soaking water)
1/2 cup desiccated coconut (dried shredded coconut)
1/2 cups (GF) oats or cashews
3 TB cocoa powder

Whack everything in your food processor and blend until it sticks together. Adding in a TB at a time of the date water if it is not sticking together properly. Then roll into a dozen balls while pretending to be  a scarab beetle or the god Khepri. Or just be yourself rolling up treats if you lack imagination or don't have time for nonsense ..

Store in the fridge. it made 12 balls...well, probably more like 13 but i kept nibbling at it. If you were making bar shapes like the actual nakd bar, I'd say it would make 4. 

Sunday, 30 September 2018

I'm Cuckoo for Cocoa

Hello lovelies! As a member of the Do-It-Yourself Beauty Brigade, I wanted to share some of my homemade beauty secrets. The best bit about them is the all revolve around CHOCOLATE.

Yeah, you heard me correctly. Chocolate. Cocoa. The baking stuff. So not only is this good for your skin and hair, it is edible. Bonus.
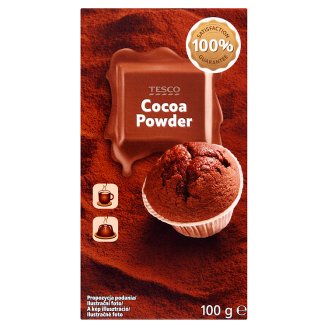
Tesco Low Fat Cocoa Powder 100 g

I use cocoa in a variety of beauty treatments and I'll tell you why.

It is natural.
It smells amazing.
It s cheap.
It really works.

The website BEAUTY MUNSTA has this to say about the benefits of cocoa powder (with a few notes from me):


Skin repair: Yes, cocoa powder helps repair skin cells! That’s because it is packed with antioxidants that fight off free radicals. Free radicals are unstable molecules that steal oxygen from skin cells to balance themselves. In the process, they make skin cells lose oxygen and become lifeless. This causes a variety of skin problems like blemishes, dull looking skin and more. So, make a cocoa powder face mask to repair your skin cells and rejuvenate your face!

 Improves Skin’s Hydration:  Did you know that cocoa powder can actually improve its natural hydration? This works when you consume cocoa powder or apply it on your skin!  

Exfoliates Dead Cells: Cocoa powder has a gentle exfoliating texture that helps slough off dead cells on skin. It is good for carefully exfoliating sensitive or acne prone skin without irritating it. Personal note:  This really works. I have been making a face mask and applying it every “Self -Care Saturday” and have seen my skin be brighter and softer.

Face mask: In a little dish mix 1 TB unsweetened cocoa powder with 1 tsp sugar and 1 tsp oil of your choice. I like sunflower oil as in is non comedogenic (won’t break me out) and is high in vitamin e. I have very combination skin, so my skin is can’t decide if it wants to be an oily teenager or a mature adult. Wet your skin with warm water then mix all those ingredients into a paste and carefully rub all over your face avoiding the eye area. It is ok to put it on your lips because it can help exfoliate dry lips and if it gets in your mouth it’s fine because it is edible. Leave on while relaxing (preferably while resting with closed eyes on a yoga mat while listening to Enya) then using wet hand carefully scrub your face letting the sugar exfoliate and rinse off with warm water.

 Fights Acne & Pimples: This cacao face mask for acne works wonders in reducing the appearance of acne and pimples. Cocoa lessens redness and inflammation caused by acne. Find the cacao face mask recipe here: DIY Cacao Face Mask for Acne

 Prevents Sun Damage: You know when they say ‘eat your sunscreen.’ Well add cocoa powder to your list of sunscreen foods because it helps prevent sun damage! A study published in the Journal of Nutrition in 2006 showed that a group of women given a flavanol rich cocoa drink showed 15% less reddening of the skin when exposed to UV light. This is due to its high antioxidant content which fights off free radicals generated when UV light hits the skin.

 Improves Skin Complexion: Cocoa can improve your skin complexion, making it brighter and clearer! The flavanols in it nourish the skin, boost its elasticity and help reduce blemishes that make skin dull.

 Firms Skin: The caffeine and theobromine found in cocoa powder make skin firm, taut and toned. That’s because they help break down fats and eliminate excess fluid retention. So, if you have sagging skin, puffy skin and even under eye bags, try making a mask out of cocoa powder and applying it to your face for a few minutes.

Makes Hair Shiny & Soft: Cocoa powder isn’t just good for skin, it’s great for hair too! It contains a significant amount of sulphur, which is one of the most important minerals for hair health. Consuming cocoa powder makes your hair shiny and soft naturally.

 Darkens Hair Naturally: This delicious powder doesn’t just stop at making hair soft and shiny! It also gradually darkens hair and helps cover up greys. So, if you’re a brunette, try making a cocoa hair mask or even mixing cocoa powder in warm water and using it as a hair rinse. Personal note: This really works. I have stopped dyeing my hair and have successfully darkened my light brown hair to a lovely medium brown shade by doing this.

Hair darkener: Mix equal quantities of unsweetened cocoa powder and your favourite shampoo. It will be the texture of that ready to spread canned frosting you can buy in a shop. Store it in a jar. With dry hands scoop a little out and rub your palms together until they are evenly coated. Rub into your hair and really massage it in. Then rinse, but don’t over rinse. I have crazy oily hair like a teenager and this has actually helped to dry it out a bit. If you do not have teenage hair, then feel free to mix equal parts of the cocoa powder with your favourite conditioner as well

Slows Down Ageing of Skin: Cocoa powder is rich in antioxidants called flavanols. The powerful 
antioxidant properties of flavanols help fight free radicals, hence making skin youthful for longer. Consume cocoa powder and also use it externally to plump your skin cells and fight premature wrinkles!

 Reduces Cellulite: Enjoy the cellulite clearing powers of cocoa powder! Because of its caffeine and theobromine content, cocoa powder helps drain fatty cells, promote flow of excess fluids out of the body which helps clear off cellulite by firming and tightening the skin. Drink cocoa powder and also make a cocoa coffee scrub to help you with this!

Cocoa Coffee Cellulite Scrub: In a large bowl, add ¼ cup cocoa powder, ½ cup ground coffee and ¼ cup liquid coconut oil. Now add 1 tsp cinnamon powder. Mix everything well to form a soft scrub. Transfer the scrub into an air tight container. To use, place 1 tbsp in a bowl and take the bowl to the shower with you. Scoop up a little and rub in circular motions over wet skin that has cellulite. Leave it on for a couple of minutes then rinse off and wash your body as usual. Use every other day in the shower.

Personal note: if you'd like a body scrub, but like me don't drink coffee so don't have any coffee grounds just hanging around try this body scrub. It makes you smell like a York Peppermint Patty (US Version) Fry's Peppermint Cream (UK version.) 

Chocolate Peppermint Body Scrub: In a jar mix 1 cup sugar, 2 TB liquid soap (helps it to wash away easier), 3 TB cocoa powder, a few TB oil to make it a paste, 10 drops peppermint essential oil. With dry hands (water can aid in breeding bacteria) scoop out and bit and scrub your body in the bath or shower. Your body will be soft and smell amazing. 

Add to your Dry Shampoo: DIY dry shampoo is all the rage these days and what’s more is that it’s so easy to make! Cocoa powder is one of the main ingredients for brunette or dark hair types. Here’s how to make dry shampoo with cocoa powder:

Amazing DIY Dry Shampoo: In a bowl, mix up 1 tbsp arrow root powder, 1 tbsp baking soda, ½ tbsp cocoa powder and 3-5 drops lavender essential oil. Dip a brush into the bowl and dab it on your hair roots starting from one side going to the other. Let it sit for a couple of minutes then brush your hair and voila! Your hair will be soft, fluffy and look and feel clean!

So, that's the wonders of cocoa! Let me know if you have a go at any of these beauty tips.

Sunday, 22 April 2018

Progress not Perfection on my Zero Waste Journey--Small Swaps

Hello my eco-conscious friends. In my last post I talked about trying to buy more NAKED PRODUCE. That has definitely been working.

I also have swapped STOVETOP POPCORN for crisps to save on packaging. I've also been making my own granola as I like to do that sort of thing and can get  nearly everything needed to make it in paper or glass. This isn't necessarily a money savings, but it's no more to make than buying a box of our favourite cereal. It is quick and easy and tastes 100 times better than store bought stuff.

This week on What we Ate Wednesday I will write about Marmalade Granola. 

Mmmmm....Marmalade Granola.

But I digress.

I started to look at ways that we use disposable items in every day life that could be substituted for something with less packaging, no packaging or become reusable.

Some were less successful than others.

 Item one: 
Cotton wool (cotton balls to my American peeps)
I like to use cotton wool. I tried to make each one last by tearing it into thirds, but i was basically using a cotton ball a day. One-third in the morning to put on my homemade ROSEMARY VINEGAR deodorant (1/3 cup rosemary vinegar plus 1-2 TB witch hazel), one-third in the morning to apply diluted apple cider vinegar to my face, and repeat that same ACV actions before bed with the final third

That's 365 cotton balls a year. .

So what did I do?
1. I swapped my deodorant into a spray bottle that I already had. Would a glass bottle be better? Maybe. But I don't have a glass spray bottle. I am all about using what you already have. Plus, i know from recent trip to the US that everything in glass had to be decanted into plastic for travel. Glass + travel= a heavier bag with something breakable in it. Which equals a giant BAD IDEA.

Verdict:
Excellent. If i spray a few times, then rub into my pits and then spray some more and rub in, I avoid the dreaded drip. Also, I need to remember to spray first and then use my body oil, otherwise the spray bottle slips out of my hand.

2. I made some reusable face wipes that can be washed in a washing machine. I know you can buy stuff like this from Etsy, from people with better sewing machines that have sergers to make professional edges around their organic unbleached fabric, but i needed to make it cheap.

I hunted around charity shops til i found a 100% cotton flannel shirt for £2 and cut it into squares and zig-zagged the edges to stop them unravelling. I store them in a jar and then put the used ones in a mesh laundry bag that gets washed when we go to the launderette. Since we only go every three weeks to wash there (otherwise we wash in a bucket) I made enough to go a full three weeks.

Verdict: 
Excellent. I have really enjoyed them, they work well (as well as cotton wool) and wash and dry nicely. I did make sure they went in the tumble dryer at the launderette so they would remain soft. Flannel can get a bit scratchy if it is left to air dry. I had tried this previously with polar fleece and the liquid just seemed to bead up on top and roll off--fleece is supposed to repel water after all--but it just never worked for me and I went back to disposables. My only complaint (if it is indeed a complaint) is that I feel like a need a wee bit more product to saturate the flannel wipe than I did a cotton ball, but since my product is merely diluted apple cider vinegar, it's not a big deal. But having to use a wee bit more product because it is ABSORBED by the fabric is miles better than it being REPELLED by the fabric.

Also, I only used the sleeves and the upper back of the shirt to make 25 little pads, so when these wear out I have lots of shirt left to make some more.

Item 2:
Garlic
I like to make GARLIC PASTE once a month and freeze it in teaspoon portions. Previously, I had spooned it into plastic ice cube trays, frozen it then popped them all out and stored them by wrapping cubes in cling film and foil and then put in a plastic baggie. I did this on advice from something I found on google. I decided to see if i could just flash freeze in my big pyrex baking pan and then pop into a jar.
Verdict:
This seems to work really well. They don't stick to each other having been frozen separately and there is no disintegration issues that I used to get prying them out of the ice cube tray. Excellent.

Item 3:
Storing leftover cake
What's leftover cake? Seriously, I know other people who always take their cake out of the pan it baked in because they have baked layer cakes, but I never bake in layers. I always leave my cake in the pan it cooked in and serve directly from the pan. My way of dealing with it has been to throw some cling film over the top of the pan and call it a day. But obviously now I am avoiding cling film where I can. This is a genius hack, it actually makes sense if you aren't too concerned about presentation.
This is an amazing coffee and walnut cake I made that was inspired by a cake I ate at the Waverley recently. When i bake a cake it makes 8 rectangular slices. After we ate the first two, I transferred what was left into some airtight containers i already had.

Verdict:
Excellent. This is a bit of a DUH moment for me, as I can't believe I never thought of this before.

Item 4:
Snail towels
In years past we had virtually fazed out disposable PAPER PRODUCTS. Since we moved to Wales and have no washing machine I have had to give up my beloved CLOTH TOILET PAPER as there is no way to wash it. We do most of our washing by hand in a bucket and only pay to wash at the launderette every three weeks. I had been good about not using disposable paper towels if I could help it, but since the Bronte Snails came into our life, our usage of disposable paper had increased tremendously. Spiders are really clean and their waste is a dry, white powder. Snails poop A LOT and they poop EVERYWHERE.  And I didn't want to wipe up their poop with the same towels I dry dishes with.

I had thought about buying some designated snail poop towels, but couldn't justify the expense.Then I had an idea. This was another DUH moment for me. A lot of my kitchen tea towels are really old and worn. Why didn't we buy more kitchen towels and relegate old tea towels for snail poop? (I told you it was a DUH moment)
I bought us some really nice waffle weave tea towels from the market (6 for £5) and relegated 4 towels for the snails. I wrote on them in a permanent marker just so they wouldn't accidentally be used in the kitchen. I relegated a separate bucket for washing, so it's all good.

Verdict:
Excellent. We've been really happy with this system. the new waffle weave towels really dry dishes well and the snail ones clean up poop and slime, dry condensation and wipe out water dishes. Feel a bit daft i didn't think of it sooner. If you have pets, i would highly recommend getting some poop towels especially if you have a washing machine, but even if you don't like we don't--it is still doable.

On an separate note, after reading my post about my beloved cloth toilet paper (I really miss it!) I am going to try to figure out a way to start again. Probably only with urine, but at least it will be a start.

Item 5:
Kitchen scrubber
I roast vegetables in my oven several times a week and we don't have non stick pans (things like TEFLON can actually be really dangerous) so i often need a scrubby doodah (technical term) when doing the washing up. Steel wool has been our scrubby of choice. Supposedly it is recyclable, but i can never find a place to take it. But it also always seems to come in a plastic tray in a plastic bag. Another reason to try and find an alternative.

I looked into some of those wooden scrub brushes with natural bristles. First off, they were hella-expensive. Secondly, what exactly do they mean by natural bristles? The ones I found online turned out to be make from pig bristles. Um...no thanks,

I came up with (what I thought was) a genius idea. I bought a loofah sponge at Wilkos for £1. No packaging. Compostable. I sawed it up with my trusty hacksaw Hank. (yes, my hacksaw has a name. What of it?)
Then I could use it for scrubbing pot and pans.

Verdict:
Of all the things I have tried, this is my lowest rated one. It's not BAD, per se, it's just not as brilliant as I had hoped. My thought when I bought it was "this is so stiff and scrubby, it feels like steel wool but natural!" Those who use a loofah will see where I made my mistake. I had not realised it would get SOFTER when it got wet.

And when you do the washing up, things have a tendency to get wet.

It just doesn't quite have the scrubbing power of steel wool. I have tried soaking the dishes longer. I have tried adding some bicarbonate of soda for extra scrubbing power. Those things help...but it is still not quite what I had hoped. I will continue to use it until I come up with a better solution.

In my journey of Progress Not Perfection towards Zero Waste I will try to keep adding small swaps that a make a big difference.

What are your tips for small swaps?

Tuesday, 17 April 2018

What we Ate Wednesday--Stovetop Popcorn

Hello lovelies! If you follow my blog then you know that we have been seriously trying to cut down on the waste we generate. So, for the next few weeks I want to share food that we make from scratch instead of buying them in plastic or in this case, non-recyclable bags.

Today, I'm talking Crisps.
Crispy, crunchy crisps.
Packets of crisps.
Chips, if you are American.

We don't indulge in crisps that often because they really are not healthy in any way. You can tell yourself they are good for you because they are made from potatoes, but those potatoes are fried and salted and so not really a health food. Plus each individual bag costs around 50p. Sure you can find multi-packs that are cheaper, but they just encourage us to eat more because they are there in the house.  Plus, you've now got at least six non-recyclable bags to throw away--the five that came in the multi-pack and the outer bag that contained them all.

I have taken a vow to give up crisps until the packets become recyclable, so every week i make a batch of stovetop popcorn. Sure you can buy ready popped popcorn these days, but it comes in a non recyclable bag and is often loaded with sugar and salt.

Yes, you can buy an air popper. We've had one. It made all the popcorn taste like polystyrene  packing peanuts unless you drowned it with butter. Again, no thanks.

So, I pop on the stove. It is economical and makes the popcorn taste better than air popped. It is better  and cheaper than single serve crisp packets as one 500g plastic bag of popcorn costs around £1 and makes 25 servings of popcorn.

25 servings. One bag.  £1.

Even I can do the maths on that.

I wasn't even going to do this as a blog post, but so many people ask me how did I make it. I don't have a fancy popper. I just use my biggest pan.


Stovetop Popcorn

In your largest cooking pot add the following:

1 TB oil (I use sunflower oil)
half a cup (100 grams) popcorn kernels
pinch sea salt

1.Use your hands or a spoon to stir the oil and coat the kernels.
2. Put the lid on the pot and turn it up to med-high. This is 5 on the dial of my hob. I have ceramic plate burners which take a few minutes to heat up unlike gas which is more easily controlled.
3. Tidy the kitchen while keeping an eye on the pot. When the lid of your pot fogs over with steam, put your oven mitts on (or grab two tea towels) and hold the handles on either side and give it a good shake. From now on shake every 10 seconds or so. I just count to ten and then shake on ten.
4. Soon, you'll hear it start to pop. Keep shaking otherwise your kernels will burn. Soon it will be popping like mad, just keep counting and shaking. I start counting to five and shaking when the popping gets going.
5. After a few minutes or so, the pops will slow down. When the pops are a few seconds apart, remove from the heat and crack the lid. Some rogue kernels may still pop. The cracked lid will let steam escape but keep late popping kernels in the pan.
6. After a minute, when it has gone silent, take the lid off and stir to move any salt from the bottom onto the top and add a bit more if you'd like.
7. Decant into a large airtight container and let cool. I keep most of it in a large resealable plastic box, and my single serving in a small plastic sandwich box. When completely cool, put the lids on to retain freshness.

I timed it and the whole thing took me eight minutes. If you have a gas stove, i bet it would be quicker as it heats up faster than ceramic plates.

Eight minutes for 5 days worth of whole food, crunchy, fibre filled snacks.

It's worth it.

Progress not Perfection on my Zero waste Journey--buying naked produce

Hello my eco-conscious friends. I am happy to report I had another successful day out with my Zero Waste Kit yesterday. My friend Sarah and I went to Skanda Vale and I am happy to say it gets easier and easier to bring my own stuff everywhere I go.

Today I want to talk about things I have doing to reduce my waste. Some have been really successful and others just so-so, but that is how you learn what works--by trial and error.

The first thing we looked at was trying to buy more fruit and veg "naked." Because we are on a tight-as-a-drum budget, money has to be a consideration. Our usual plan of action had been to buy everything from Lidl in a plastic bag because the prices are so good. Lidl sells little to no loose produce, so if we were going to do this, we had to first do a cost analysis.

Now I love this sort of thing. I am happiest when making little charts and diagrams and comparisons. The one thing I struggle with is the math aspect of it. But most places tell you the price per kilogram so I don't have to work it out myself, but occasionally I had to do a little calculating on paper. And then double check by using a calculator and then get Spiderman to check my calculations. Sigh...

We are lucky in that we have several supermarkets that we can get to. Carmarthen has a Lidl and a Tesco and a Marks and Spencer Food Hall all within walking distance of our house. Spiderman works in Lampeter and there is a Sainsburys there.

What I did was write down everything we normally buy in plastic and the price we paid for it, so I would know how much more it would cost to buy it without plastic. The agreement was if it was a small difference between loose and plastic (something like 15p) we would do it, but if it was like 50p or more to get it plastic free, we would continue to buy it bagged.

Would we like not count the cost and just be 100% zero waste? Sure, but it isn't going to happen at this time.

This is what I found:
carrots
45p per kg bagged at Lidl, 60p per kg loose at Tesco and Sainsbury--15p more---- YES

mushrooms
£2.83 per kg in plastic at Lidl, £2.75 per kg loose at Tesco, £2.70 per kg loose at Sainsbury--8p to 13p less---YES (this surprised me--most things are more to buy loose)

onions
57p per kg in a plastic net at Lidl, 75p per kg loose at Tesco and Sainsbury--18p more--YES

new potatoes
price varies at Lidl but on average 75p per kg, no loose new potatoes at Tesco, Sainsbury and M&S both sell loose new potatoes for £2.50 per kg--£1.75 more--NO

oranges
in a plastic net at Lidl 97p for 5 medium oranges, both Lidl and Tesco sell loose oranges at 30p each so it is 53p more to buy them loose. --Maybe. We have been buying them loose because I have found some savings elsewhere (9p savings on buying 500ml sunflower oil at Poundland not Lidl etc)  I think we will buy them loose, unless there is a sale on, then buy them in a net.

broccoli 
£1.28 per kg in plastic wrap at Lidl, £1.57 per kg loose at Tesco, £1.35 per kg at both M&S and Sainsbury. 7p more--YES.  A thousand times yes. I have bought loose broccoli twice at M&S, both times selecting the biggest head i could (sadly, they have no scale, so i never knew how much it was going to be) but each time paying around 57p and that head of broccoli fed us for three meals which is incredible value for money.

apples(Braeburn or Gala) 
Hard to say about apples at Lidl, there are different kinds in bags all at different prices per kg, they did have some loose ones but they were GINORMOUS and I didn't want to get two apples the size of a baby's head for one kilo, so I looked elsewhere. £2.20 per kg at Tesco, but again...a bit on the big side. That's what makes bags convenient as you get 5-6 smaller ones. £2 per kg at M&S and Sainsbury. I haven't seen the ones at Sainsbury in person, but the M&S ones are a decent size. Not huge, but not titchy either. I got 5 apples at M&S at roughly 37p each. YES

peppers
pretty much everywhere you shop, loose peppers are 55p each. I can get a bag of three at Lidl for 92p (sometimes less) That's a 73p difference.--NO

Tinned tomatoes
34p each at Lidl, 35p each  at Tesco. these are both loose without that shrink plastic connector thing. Buying the shrink plastic set of 4 at Tesco, they are only 1 p more. YES

Baked beans (reduced sugar and salt)
we prefer the reduced sugar and salt cowboy beans from Tesco. This really chaps Spiderman's ass (as they say in the American South.) To buy them loose they are 32p each, to buy them with that shrink plastic connector thing they are 4 for £1, making them 25p each. Why should it cost LESS for extra packaging???? We always buy a 4 pack because sometimes i am too tired to cook and you need something easy and healthy. It's 28p more to buy them loose--YES, but grudgingly. 
Side note: I have found that Sainsbury will collect the plastic shrink wrap on multi packs of cans in their carrier bag collection box.

Recycle Now says they also collect:

YES

Plastic carrier bags

NO
Any non-Polyethylene film (e.g. PP, PVC, others)
Plastic bread bags (shake out)
Cling film
Plastic cereal bags i.e. Porridge Oats (not inners from boxed cereals)
Food and drink pouches
Plastic wrappers and ring joiners from multipacks of cans and plastic bottles
Crisp packets
Plastic wrappers from toilet roll and kitchen towel packs
Film lids from ready meals and food trays
Plastic freezer bags 
Plastic magazine and newspaper wrap (type used for home delivery only)
Thin bags used for fruit and veg at supermarkets
Bubble wrap
Low-density polyethylene (LDPE) - resin ID code 4

 The list above will help us recycle some of the things we have previously thrown away because our local counsel doesn't accept them (like plastic wrappers from toilet roll and magazine wrap)


So what have I been using to bag my naked produce? After much consideration, I have chosen to buy rather than make something. I normally am all about the DIY, but the bags needed to be lightweight and see-through and I didn't have anything in my fabric stash that fit the bill.

I ended up buying some of those zippered lingerie bags from Poundland. They are perfect. Easy to fill, machine washable, 10g in weight (so they don't add much to your cost since the supermarket won't subtract the weight of the bag)

Every shop i went to, someone stopped me and marvelled on what a good idea it was and where did I buy them, so hopefully planting seeds of being a good eco-steward.

Here they are in action:
apples and broccoli from M&S


mushrooms and onions from Tesco

The only downside to the bags is they came in a plastic packaging, but the packing says "Please recycle this packaging" as opposed to the dreaded "This package is currently not recyclable" so i am going to try my luck taking it to the Sainsbury bag collection.

So are we mostly plastic free? Well, there are some things like cucumber and lettuce for the snails, salad, kale and spinach for us that are always in plastic and never naked. I can see why kale, spinach and salad need to be bagged, but why-oh-why does a cucumber need a shrink wrap???

We have started using empty salad, kale and spinach bags as a bag in the bathroom rubbish bin. We figured give it a second job before it goes in the black bag.

In my next post, i'll go over some of the other ways we have made changes to reduce what we throw away.