Hello
lovelies! It has gotten HOT here. Like Wicked Witch of the West hot. Life
without air conditioning is no joke. I want to get in and out of the kitchen as
fast as I can.
One of our
successful formulas for a meal includes potatoes boiled in strong vegetable
stock, beans, whatever veg we have in the cupboard (usually onion, red pepper,
carrots) and kale covered in a dressing or sauce. There are endless variations
on this and they come together quickly.
I saw a friend
had made a “honey” mustard dressing over crispy potatoes in her air fryer. We
don’t have an air fryer and damned if I am turning my oven on for ANYBODY even
though I know how to make crispy potatoes in there. Nope. Na-uh. No way. Too
hot.
But I did
think I could do a “honey” mustard sauce over our standard potatoes/veg/beans/kale
combo.
This was delicious
and we would definitely eat it again.
Lemon “Honey” Mustard
Quick Bowl
400g new potatoes, diced
Vegetable stock to cook the potatoes in
1 onion, sliced into rainbows
garlic
¼ of a red pepper
Half a carrot, cut into matchsticks
Tin of beans, drained and rinsed (chickpeas would
be great. I used borlotti as that is what I had. )
100g kale –several handfuls
Sauce:
Juice of one lemon
2 TB wholegrain mustard
1-2 TB liquid sweetener (agave, maple syrup, golden
syrup)
Salt and pepper to taste
1. Cover your potatoes with cold water and a stock
cube and bring to the boil. Boil until able to be easily pierced by a fork.
Drain reserving about ¼ cup.
2. Meanwhile cook your onion in a splash of
vegetable stock from the potatoes. When softened, add the garlic, pepper,
carrots and let them cook down.
3. While the veg cooks, mix up the sauce in a
little bowl and set aside.
4. When you drain the potatoes, add in the kale and
the beans to the veg mixture and cook with the ¼ cup of stock you reserved when
you drained the potatoes. When the kale is bright green and reduced, add in the
potatoes and the sauce and stir to coat. Taste and see if it needs more lemon.
5. Serve in a bowl. Bonus points if you can make
your carrots look like the mark of Zorro.
Hello lovelies! Last week I was bemoaning the fact
that all my bananas were as green as envy and then suddenly overnight…BOOM! They
were all yellow and very spotty. So I thought I better freeze them and now all my
freezer space is taken up with frozen banana chunks!
But I still had a bunch of bananas that wouldn’t fit
in the freezer, so I thought since the weather has warmed up I could make us
some banana ice cream to use some of them up to make room for the last ones to
get frozen.
I break my bananas into rough chunks and freeze them in
a big resealable container. Once frozen they can easily be pried apart for
smoothies or Nice Cream.
I do mine in my high powered blender using the tamper
to press the bananas into the blades (I have to stand on a step-stool to do this) but if you don’t have a high powered
blender, then it can be done in a food processor—just let the frozen bananas
thaw for about 5 minutes before you blend and you might need extra milk. The
cocoa can make it slightly bitter so even with ripe bananas you may need a bit
of extra sweetness. I used a micro pinch of this new uncut pure stevia I just
got and it really did the trick.
This made enough for two parfait glasses. Aren’t they
adorable? I got them at Poundland if you can believe it?
Chocolate Peanut Butter Nice Cream
2 bananas, peeled and broken into chunks
and frozen overnight
2 TB unsweetened cocoa powder
2 TB peanut butter
Tiny shake of pure uncut stevia or a glug
of liquid sweetener like agave/maple syrup/golden syrup
Hefty splash of milk—maybe 1/4 cup?
Put everything in your high powered blender or food
processor and blend until a smooth soft serve texture of ice cream develops. If
using your high powered blender, use the tamper. If using a food processor stop
and scrape down the sides often.
Eat and go mmmmm…and then ahhhhh because it has been
really hot.
Hello lovelies! In my effort to reduce our waste I looked into my blue recycle bag and saw what seemed to take up the most space and it was tetra packs. Cartons. Mostly of almond milk.
Then I went on a picnic with a friend and we talked about how thirsty of a crop almonds are and how much water they need to grow and I got to thinking that maybe if I could find a lower waste DIY milk I would give it a go.
My first thought was Oat Milk. Oats are relatively cheap, but I tend to use milk on homemade granola made with oats and I didn't want to over-oat myself by having too much of a good thing at all once as that tends to give me tummy ache. Plus you have all this oat pulp that you strained out that you have to either dump or find a use for. When i looked into the logistics of buying a nut milk bag (or nut sack bag as my friend Jo refers to it as) and thought about the act of straining anything through a fiddly bag, it just sort of took the wind out of my eco-sails.
I needed something relatively cheap and extremely easy.
Then I thought of Cashew Milk. Cashews are something I can buy in bulk. They are soft and creamy and blend well. There is no need to strain.
Cashew milk for the win.
I scored some 750ml Kilner-type bottles at Poundland that were the perfect container. I had hoped to buy the cashews in the zero waste shop but they were nearly 3 times more expensive than buying them in a bag by the kilo at Grapetree. I have reused that nut bag as a rubbish bag in the bathroom. That's the best I can do for now.
I have not sterilised the bottles, just washed them in very hot soapy water right before i added the milk and all has been well. The cashew milk only lasts 3-5 days in the fridge anyway. A word of warning--it does separate, but just give it a shake before you use it and all is well.
I am still experimenting with how I make it. But this amount is just right for one person using milk daily for granola and the occasional date and banana smoothie to use up within 5 days.
I am thinking about supplementing. Maybe a brazil nut or two and possibly added calcium powder. We use calcium carbonate (limestone flour) for the snails and so why couldn't I add some to the milk? The one we buy for the snails is 100% pure with no additives and i read online that 1/2 tsp per litre gives you the equivalent calcium as cow's milk. The snails are EXTREMELY delicate and this has been fine for them, so why can't we eat it? The calcium we buy for the Bronte snails is THIS ONE. It says it is for reptiles and poultry. There is a food grade one HERE if you are squeamish about the animal one but it costs 3 times as much.
This is the recipe I use. It works well for me. I soak the cashews for a few hours beforehand. Partially to make blending easier and partially because it makes the vitamins and minerals more bioavailable. Just soak for a few hours, then drain and rinse well.
Cashew Milk 1/3 to 1/2 cup soaked cashews (1/3 cup is more like the watery texture of semi-skimmed milk, 1/2 cup thick and creamy like whole milk--can you guess which one I like best?) 3 -4 cups water (I use 3 cups as that's how much I can drink in 3-5 days) 4 pitted dates (soaked as well if not really soft) pinch of salt
Instructions:
Blend in a blender until smooth. Decant in a clean bottle and refrigerate. Use within 5 days.
That's it. It takes no more than 5 minutes to make. Tastes amazingly thick and creamy. Cheaper than store-bought milk.
It will also be quite foamy when you take it out of the blender...but that settles down. Although the froth probably would be lovely in a hot coffee if i were allowed to have caffeine. Which I am not after eating a box of chocolate covered coffee beans at work recently and things went badly wrong. But that's a tale for another time.
Have you heard of Silicon Heaven the afterlife for appliances? No? Clearly, you are not a fan of the sci-fi show Red Dwarf. Watch this clip and it will all become clear to you.
I am sad to say that our beloved Vitamix blender has gone to Silicon Heaven. We got this high powered, industrial baby in 2010 right after my horrible hysterectomy.
That's six years ago.
The warranty was for five years.
You do the math.
She had started making a slight urgh urgh noise and smelled faintly of burning rubber the week before she died. Then one day right before Christmas, black smoke started pouring out of her during my morning smoothie.
To be fair, she might just be in a coma. It might just be that she needs a new belt or something. There was a definitely PING! sound like a screw fell out after the black smoke. But we can't even figure how to open her up for surgery, so at this point she is considered MIA, presumed dead. If you are a handy sort of person who lives nearby in Wales, please feel free to contact me and offer surgical assistance.
So what to do? We couldn't afford to replace her. A Vitamix costs an arm, a leg and a kidney. We needed a new blender, but one that was affordable. We also needed one that wouldn't die at our first attempt with serious blending. A Vitamix has a 1380 watt(nearly 2 horsepower) motor.
You get spoiled to a high powered blender.
Well....a bit of searching on our parts and I found us an incredibly affordable replacement. It is not exactly a like-for-like, but it is good and we are happy.
I present to you the newest member of kitchen appliance family:
The Tower Xtreme Pro Blender.
She is a lot smaller than the Vitamix so we have lots more counter space. We need all we can get in my tiny-ass kitchen.
But how does she measure up?
Pretty well, actually.
Wattage and horsepower Vitamix --1380 watt (around 1.93 horsepower) Tower--1000-1200 watt ( between 1.34 to 1.6 horsepower)
This is pretty close considering many of the blenders we saw were around 400 watt. Size of jugs (no boob jokes, please) Vitamix--2 litre Tower--you get a 1 litre jug and a 800ml jug
So far this has not been a problem as we rarely blended up large amounts of stuff anyway. This has the bonus of "blending in the cup you drink from" so there is less washing up. It also comes with 2 lids for the blender jugs--one for storing and one with a drinking top for travel. Plus, you can order spare jugs for £7.99.
Speeds Vitamix--variable speeds Tower--one speed
So far, this has not been an issue. The little Tower blends like a champ. Price Vitamix--£459 and you have to order online and have it delivered Tower--£28 at Wilkos--bought it locally and carried it home
Well, that pretty much decides it then.
Will it do *everything* a Vitamix does? No, but it will do lots of things.
It came with a wee cookbook, so that helps to know what you can and can't do in it. It has many nut recipe, but the cookbook recommends soaking your nuts (again, no jokes please) and so we have.
Was it easier to just throw hard stuff like nuts and dry dates straight in the Vitamix without soaking? Yes. But is it really all that hard to put stuff on to soak before you go to bed to make the next day? No.
So far I have made countless smoothies, 2 cashew cheese sauces and creamed corn. It has worked beautifully.
Everyone goes crazy for a Vitamix saying it is perfect, but are there any drawbacks to a Vitamix? A bit. You can't remove the bottom of the blender so cleaning around the blade was a bit tricky to clean. The Tower has a removable bottom so you can wash it really well and you don't have to worry about gunk lurking under your blades.
Are there any drawbacks to the Tower? Not really. The only thing is the rubber seals on the removable bottom need to be checked EVERY TIME you blend as they can easily work themselves free and cause leakage. Is that really a problem? No. it just means I take 10 seconds to check before I blend.
Are there things the Vitamix can do that the Tower can't? A bit. The speed and heat of the Vitamix blades can make soup, but who wants to have their blender run for 6 minutes? Jeepers, you'd need noise cancelling headphones and an aspirin after that. A Vitamix can turn frozen fruit into sorbet, but we only ever did that in the summer and only if fruit was on sale. We only did it once last year, so not really missing anything. Besides, I can make banana ice cream in my food processor.
I am also working hard on being content with what I have. If you have seen my vision board then you know this is part of goals for 2017.
To be honest, the Tower works pretty well so I am not having to try very hard to be content with it.
Would I buy another Vitamix? After careful consideration....no. My little Tower takes up less space in my kitchen, blends everything I have asked it to do and only cost £28. I can think of lots of ways I could use £449.
But the million pound question is: Where do all the calculators go?
I have always been more of a cake baker, but truth be told--I love me a muffin. Or a cupcake. What is the difference? Size? Sweetness? Healthiness? Frosting?
I dunno. But I like 'em.
They are handheld. They have a cute little shape. They are portion controlled. What's not to like?
Well....muffin pans for a start.
I went through a faze where I wanted all silicone bakeware. It was supposed to be non-stick and flexible to get your food out. yeah...but it also was a pain in the arse to deal with. The cake pans were so floppy that you needed to put them on a cookie sheet just to get them in and out of the oven and they never cooked properly. The baked goods were as rubbery as the pan. I had muffin tins as well and they were just as horrible. The few times I tried to make muffins they stuck horribly to the pan and ended up with a weird rubbery smell.
Epic/fail.
So they were eventually consigned to a charity shop in the hopes that some one else might want them.
But recently, I have invested in a metal loaf pan from Poundland of all places. I love that pan. We have had many super-duper-always-comes-out-right breads and cakes with that £1 loaf pan.
So when I saw some interesting recipes that needed a muffin tin I thought it was time to reinvest. This time in a metal one. Because metal pan actually cook the food.
I tried Poundland and the 99p Shop (weirdly both owned by the same company!) with no luck. Eventually after some price comparisons I bought a 12 muffin pan (not two 6 muffin pans) from Wilkinsons for £4. I could have paid more for a non-stick one made with Teflon but there are lots of health indications with using Teflon such as the fact that fumes from heated up Teflon can be deadly to birds. So I just got a plain ole metal one that I would either need to grease or line with paper muffin cases.
My first try was some fat free chocolate and cranberry muffins from Happy Herbivore. http://happyherbivore.com/recipe/ruby-chocolate-muffins/They were ok.I chose them as I had some frozen cranberries left from Christmas in the freezer that needed to be used up. The recipe called for apple sauce and so I tried pureeing a couple apples with some water in my blender. It was ok, next time will probably use soy yogurt I just didn't have any on hand at the moment.
There was one little itty bitty problem, however. I tried to use some muffin cases that someone had given me at Christmas and they stuck to the muffin. Are you supposed to grease them? If so, then what is the point of the paper????????
Really stuck. It got to the point where I just thought "Well. a little paper is just some extra fibre" and ate them anyway. But after flossing a bit of paper out from between my teeth I just decided to do it the old fashioned way.
Oil.
I am not oil phobic. I don't think too much is healthy, but a little is good for keeping your joints lubricated. Most of my baked goods have some oil and some yogurt for moisture.
And boy did a little dab o' oil do the trick. Since then I have made two muffin sized dishes--one sweet and one savoury.
HummingbirdCupcakes and mini chickpea batter quiches! Whoa mama, these were both amazing. Despite the heat (it is getting a tad warm to be using the oven over here without air conditioning) these were definitely worth it.
Do you know the children’s book The Tiger Who Came to Tea by Judith
Kerr? One morning there is a knock at the door and Sophie and her Mummy are
surprised to find an enormous tiger who asks very politely if he can come in
for tea as he is very hungry. He does and then proceeds to eat up all the food,
drink all the tea (straight from the spout of the teapot) and then drink up all
the water from the tap. He drinks so much there isn’t enough water left for
Sophie to have her bath. After he has eaten them out of house and home he
leaves. The father comes home from work, hears the tale and sees that there is
no food in the house and suggests they go out to a café. Sophie and her Mummy go
shopping to replenish all the food in the house and buy a big box of tiger food
but the mysterious tiger is never seen again.
Going with my theme of feeding animals from famous children’s books some
cake and using up the marmalade (the last cake was a marmalade tea loaf for
Paddington) I thought I would have a go at a tiger-y looking cake (orange
and brown) and fulfil my desire for a Jaffa cake flavour--chocolate and
orange.
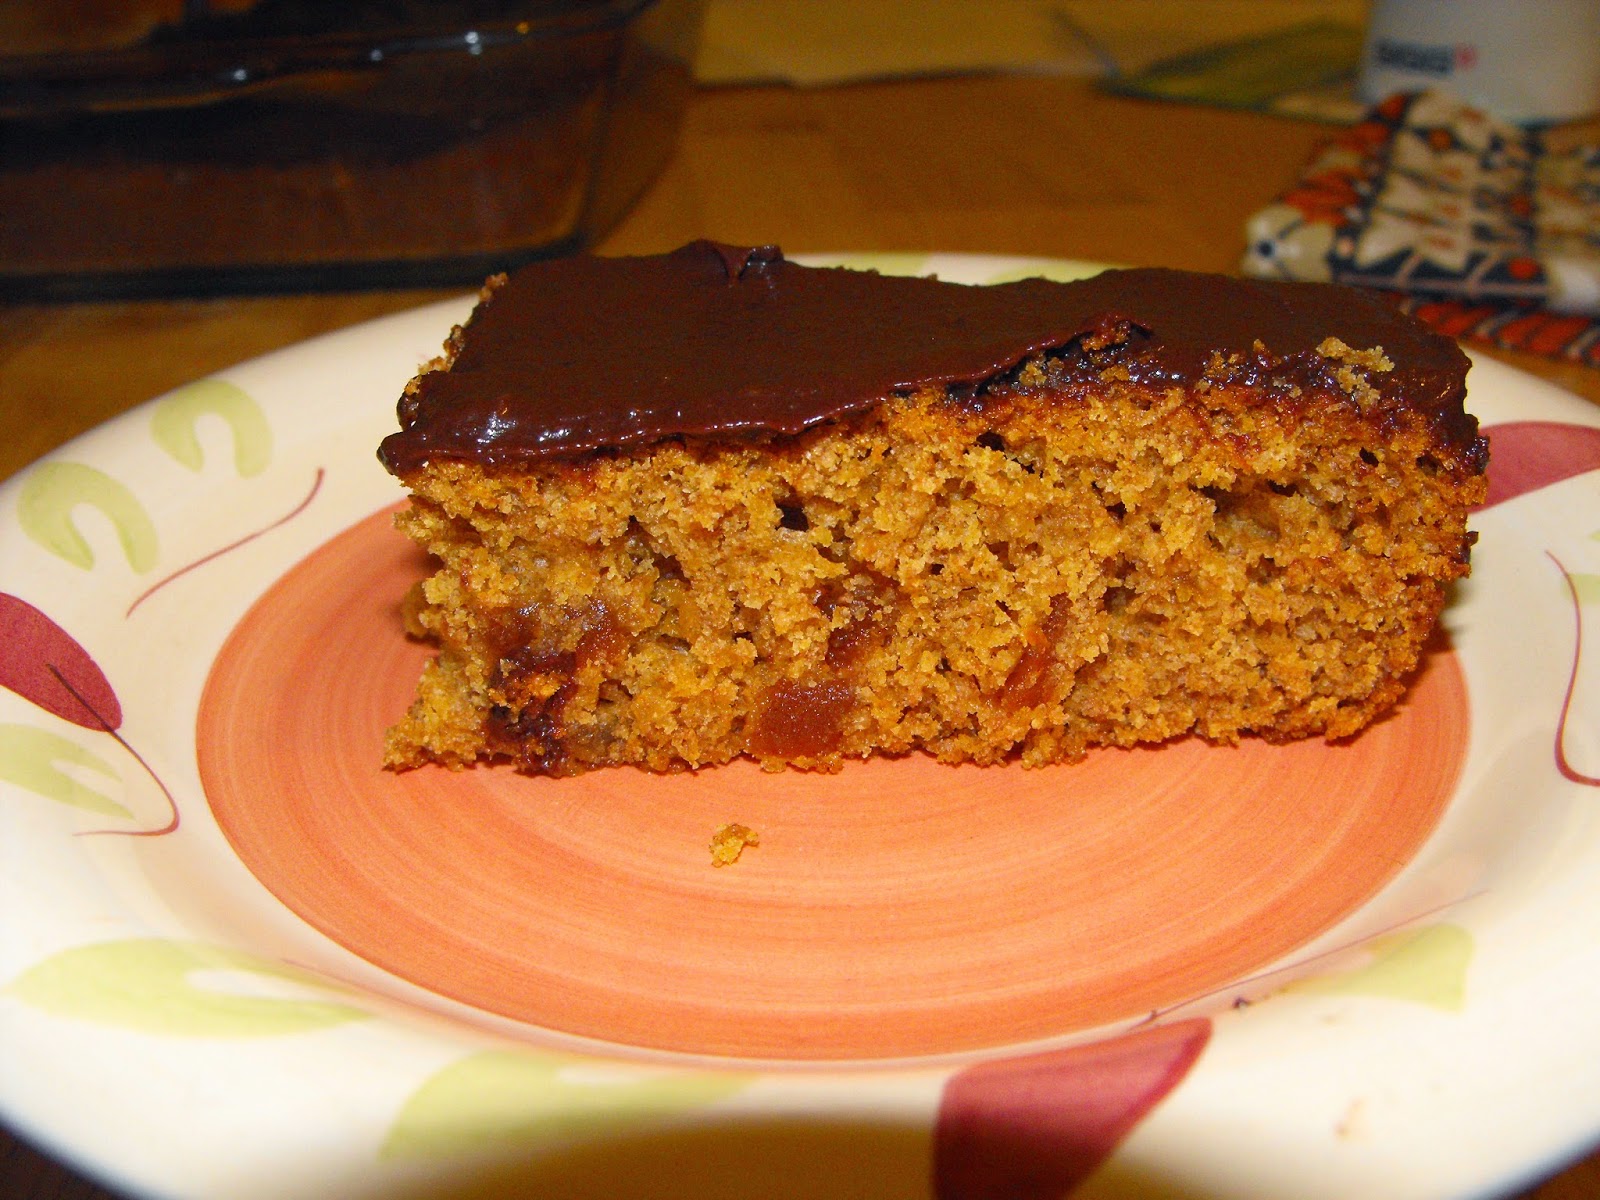
For the Tiger Who Came To Tea Cake, I made a regular cake and
stirred in 4 TB marmalade and frosted it with a chocolate icing. I used to
always just mix the sugar with the dry ingredients and then add the liquid and
oil but I went with the technique of creaming the oil with the sugar and then
adding the liquid to it and it really made in a difference in my humble
opinion. The cake was sooo light and fluffy. It rose beautifully and did not
sink (like sometimes happens with spelt flour due to the lower gluten content)
and was melt in your mouth tender. The chocolate frosting was a new thing I had
never tried before--it is more like a layer of whippy chocolate pudding on top
instead of getting hard like icing does. It is made with pureed dates and is
delicious.
Blend well being careful about the steam. Then add:
1 ½ cups pitted dates (I used cheap, rather dry dates I got from Poundland
and it worked fine)
Pinch salt
½ tsp vanilla
Then blend like heck until a thick glossy smooth paste forms. YUM! Then
scrape into a container and let chill in the fridge for at least three hours.
It will never get as firm as frosting made with sugar but this tastes
*amazing*--thick and fudgy like a pudding. In fact you could eat it as a
pudding! Or spread it on crackers for a dessert treat (which we will as I didn’t
use it all on the cake. Leftover frosting=yum!)
For the cake:
Preheat oven to 180C/ 350F
Grease an 8x8 square pan
Sift together:
1 ½ cups whole wheat flour (I used wholemeal spelt)
1 tsp baking soda
1 tsp baking powder
Pinch salt
In another bowl cream together
½ cup Demerara sugar
¼ cup oil
When thoroughly mixed add:
¾ cup orange juice
4 TB marmalade
1 tsp vanilla
Shake cinnamon
Mix liquid ingredients well and then slowly add in dry ingredients until
just mixed (don’t over mix)
Pour into greased pan and lightly tap pan to eliminate air bubbles. Bake
for 35 minutes or until a toothpick comes out clean.
Let cool completely and then frost with the chocolate frosting. It’s
like pudding on top of cake!
Can I just say….this was…..amazing. The marmalade tasted sooooo good
inside the cake. I prefer it to the Paddington cake with marmalade on top.
Spiderman was partial to the dense texture of the Paddy cake as all the glaze
had dripped through the cake but I liked the light, fluffiness of the Tiger
cake--plus it has chocolate frosting! What’s not to love?
Luckily we still have some marmalade left so we can both have more cake.
Mmmm….cake.
Try this and you will not be disappointed.
And if a tiger should happen to come to tea, you will
be ready
Lately I have been looking for a filling smoothie to help me make
it through the morning without snacking. The mistake often made is too much
fruit which is undoubtedly delicious but sends your sugar levels skyrocketing
and then crashing and you feel hungry a few hours later. I was trying to
develop something with more staying power.
I know from experience that protein and a bit of healthy fat are
the keys for me. It is what keeps me full and my blood sugar even. Many
vegetarians and vegans hear the annoying ill-informed question of “But where
do you get your protein from?”more
times than we would like. Actually, every food has some amount of protein in
it. But that’s why if you add beans or a sprinkle of nuts to a salad you
feel more full than with lettuce alone.More protein.The next question
we often hear is, “But where do you get calcium from if you don’t drink
milk?” which for me is a combination of fortified foods (many soy
milks and orange juices have added calcium) naturally high in calcium foods
such as kale and sesame seeds or almonds.
Could I make a breakfast shake that was high in both protein, healthy
fat and calcium? Yes I could. Most recipes call for a scoop of protein
powder. Now protein powder is hella expensive and often full of weird
bulking agents and fillers. Whey protein is the cheapest, but who the
hell wants to eat that? Whey is a by-product of the cheese making industry and
it is illegal to dump it in rivers and streams because it is toxic to fish and
aquatic life. Why would I want to put something poisonous in my body?But millions of people do every day because
whey powder is sold to the food industry as a cheap filler in processed
convenience foods. Check your labels and see if I am wrong.
So how could I have the desired outcome I needed for cheap making sure
it was healthy as well?
Well duh. Beans to the rescue again. Wait! Don’t run away screaming just
yet. Hear me out. Have you tried my amazing black bean brownies and all the other variations? http://spidergrrlvstheworld.blogspot.co.uk/2012/08/spidergrrls-beany-bar-yum-yum.html
Everyone who tries these raves about them. Can you taste the beans? No. Would
the same be true for the smoothie--could you really not taste them? No, not at
all.
First I rinsed and drained some white beans and some black beans. I
blotted them with a tea towel to take off any moisture and froze them in a
single layer for several hours.
Then I scooped them all up, loosened up the stuck together ones and
plonked them in a ziplock bag. Sorted.
So right now I have two breakfast shakes--a chocolate one and a
gingerbread one. Oh mama.
1) Start by putting 200mlfortified plant milk in a blender. I use Oatly. Boom! That’s 60%
of your vitamin D, 30% of your riboflavin, 30% of your B12 and 30% of your
daily calcium. Sorted.
2) Add ¼ cup frozen beans. That’s fibre and protein that
will keep you fuller longer (4.1g fibre and 3.62g protein in black beans and
2.6g fibre and 4.01g protein in white beans) plus ¼ cup white beans
contains 4% of your daily calcium 8% of your daily iron and ¼ cup black
beans contains 4% of your daily calcium, 11% of your daily iron and 4% of
your daily vitamin C. Who knew?
3) Blend until the beans are dissolved which is like adding lots of
little ice cubes as the beans are frozen.
4) Add ¼ cup of oats which adds 1.9g of fibre, 1% of your
daily calcium and 4% of your iron plus 3.03g of protein. Or you can add ¼
cup of something like Ready Brek which is super smooth porridge oats
that have been fortified with extra calcium, vitamin D, iron, B2, B6 and B12.
.
5) Add 1 Tablespoon tahini paste made from sesame seeds. You
could use peanut butter as we are going for fat and protein, but why not use
tahini as it is so high in calcium? I prefer the richer complex flavour of
roasted unhulled sesame seeds personally as the hulls make it higher in
calcium. If you don’t dig tahini then go for almond butter as it is also high in
calcium. But 1 TB tahini will give you 2.55g protein, 64mg of calcium and
8.06g fat. Don’t freak out on me. A bit of healthy fat is good for you. The
fat will make you fuller longer.
6) for a chocolate smoothie add 1 TB unsweetened cocoa powder
(1.06g protein, 1% daily calcium and 4% daily iron!) , a date or
a Tablespoon ofraisins if the cocoa
makes it bitter and ½ tsp cinnamon
And for a gingerbread smoothie add
1 TB blackstrap molasses and 1 tsp cinnamon (or use a chai spice mix like
cinnamon, ginger, cloves, allspice and nutmeg-super yum!) The molasses MUST
be blackstrap as it has the highest amount of nutrition. I Tablespoon of
blackstrap molasses contains 200mg calcium--seriously! That’s nearly one
quarter of your recommended daily amount right there! Plus 4.5mgiron which is nearly a quarter of your
RDA. Plus 45mg magnesium and 510g potassium plus a host of trace
minerals like copper and manganese!
7) Add a frozen peeled ripe banana and whiz all together. One
banana is one of your “five a day” fruit and veg! Plus it makes it sweeter
without adding extra sugar.
Serve in a mason jar because that's how all the cool kids drink it.
Chocolate:
Gingerbread:
The smoothies are delicious and thick and filling thanks to all the high
fibre, protein and fat. After having one I can go hours and hours without
eating. I am not weak and starving by 10am. I am fuelled for the day.
I swear you can’t taste the beans.
Give this a try and start your day right. And if you don’t want to faff
about every morning opening up a bajillion containers then pre-pack your dry
stuff like oats and cinnamon. So you can just dump it in there and only have to
add the liquid or sticky stuff.
Oh and one more tip. If you oil the spoon the molasses sliiiiiides right
off.
No excuses. Make this and start your day off right.
Yes. It is safe to say I am
having a love affair with pizza. Ever since I got that cookbook called Vegan
Pizza we have had a different pizza every weekend. Each one different but
all equally delicious. Every fortnight on a lazy Sunday afternoon, I make a big
batch of dough and then half it and freeze it. For the next 2 weeks all I have
to do is take the dough out the night before to defrost and BAM! Practically
instant pizza. Honestly, it takes less time than ordering from Dominoes.
The three most recent
varieties we have had were:
1) Spinach, onion and
spicy mushrooms. Sorry the picture is pretty crap, the steam kept fogging the camera lens. But the pizza was good.
can you see the steam rising off that hot pizza?
You layer the spinach close
to the sauce and cashew cheese and then add onions, regular mushrooms and spicy
mushrooms. I made the spicy mushrooms by cooking the mushrooms in a bit of
tamari soy sauce and liquid smoke and some Italian spices plus lots of paprika.
Lots and lots of paprika. Perhaps too much paprika. Will cut back next time. I
also think I might try just marinating/coating the mushrooms in the spices and
then putting them on the pizza to cook in the super hot oven instead of pan
frying them first to save a step. But the spinach on there was yummy and we’ve
almost always got spinach so that would be good to just tuck onto any old
pizza.
2) PB/BBQ pizza I know
you are thinking ????what???? But trust me on this.
Mix ¼ cup Peanut butter with ¼
BBQ sauce and add 2 cloves minced garlic and 1 tsp maple syrup and 1 TB very
hot water to help it mix up and you have a crazy good sauce. Top itwith cashew cheese sauce, bell pepper, onion
and sweet corn and yum it up.
3) Taste of India pizza.
Oh my goodness this was bloody amazing.
For the sauce you mix 2 TB
curry paste, 2 TB tomato puree (paste) 4 TB cashew cheese sauce and 1.5 TB
mango chutney. Top with onion, bell pepper, carrot and mushroom. The sauce was
eyes-rolling-back-in-your-head delicious I just wish I had put on more veg as
they shrank up considerably in the super hot oven.
We almost always have Patak’s
Balti Curry Paste in the fridge as it last for 6 weeks after opening and
makes many a quick healthy dinner. Cook up some lentils and veg and throw a bit
of curry paste in there--POW! Instant curry. I prefer curry paste to curry
powder as it has more depth of flavour. It does have some oil in it but also
tomato puree and spices. In my humble opinion, curry powder can make a meal
taste “chalky” but curry paste makes it rich. Curry paste is a cheaper buy
economically but I spend roughly £2.19 on a jar of curry paste and it lasts 6
meals so that is really only 36.5p per meal. The chutney on the other hand was
a new brand for me. We used to buy Geeta’s spicy mango chutney because
it used sugar and not high fructose corn syrup like many of the cheaper
brands.But it cost £2.09 and we are on
a budget so I tried a new kind from Lidl. It was a brand I did not know
but used sugar and not HFCS, you got 50g more than the Geeta’s and only cost
89p. That is a big savings.
The verdict: The budget brand
(Kanpur Garden) was delicious. It was sweet, tangy and spicy like a
chutney should be. There was a real depth of flavour because it had the exact
same nine spices that Geeta’s did (mixed spices, garlic, cumin, kolonji seeds,
fenugreek, black pepper, paprika, cloves and cardamom) but it was smooth rather
than chunky. I can live with
that.
I have to say every unknown
brand we have bought at Lidl has been delicious. Some have slightly strange
names (Crusti Croc comes to mind--it sounds like an alligator with
impetigo) but they sell tortilla crisps that tastes almost exactly like Doritoes
Chilli Heat Wave but without the MSG and less than half the price. Plus the
El Taquito brand of salsa is really delicious and every few months goes
on sale for half price making it 32p a jar so we stock up.
So that has been our pizza
weekends. Just because we are on a budget doesn’t mean we still can’t have fun
food that is delicious and nutritious and with a homemade wholemeal spelt crust
and lashings of veg, it is a pretty good deal.
Oh and since all the recipes use the
cashew cheese sauce, here it is again for viewers at home who want to make it.
Cashew
Cheese Sauce
1/2
cup cashews (if you don't have a high powered
blended soak them for a few hours to soften them and then drain)
1/2
cup nutritional yeast like Engevita
½
cup plant based milk (we like Oatly)
2
TB lemon juice
2
tsp Dijon mustard (we like Grey Poupon)
Pinch
salt
1
tsp onion powder (optional)
1
clove of garlic, minced (optinal)
Put it all in a blender and whiz until
smooth. That’s it. This freezes well and can be defrosted overnight in the
fridge for additional pizzas. It is less pourable after being frozen so I “blop”
it on the pizza and smoosh it around the sauce a bit. Freezing doesn’t affect
the taste, just the thickness.
Bon appétit! Possibly Bwyta'n dda! in Welsh but don't quote me on that just yet.
There was a time when coconut oil was a no-no because of the saturated
fat, but new studies have shown that coconut oil is a different kind of
saturated fat. It is not the kind that clogs your arteries/affect your
cholesterol like the sort that comes from animal products but rather is a “medium
chain fatty acid”(MCFA) which means it
doesn’t store as fat, but rather burns off as energy. Coconut oil is high in
lauric acid which makes it antifungal and antibacterial and anti lots of other
bad things as well.
What is the difference between coconut oil and butter? Oil is just
that--oil. The butter is made from coconut meat and is full of fibre which
means a spoonful can be a snack that holds you until the next meal. It has been
said that including some coconut oil/butter in your diet can help you lose
weight by increasing your metabolism, taking the stress off your pancreas and
supporting your thyroid gland.
Before we go on, I’d like to say a few words about what I’ve just
written. I’ve used the words butter and meat--and I am in no way talking about
animal exploitation here. Why do the meat and dairy industry think they own
these words? Butter is used in lots of words to denote a fatty
substance--peanut butter, coconut butter, cocoa butter, shea butter, etc. None
of those are made from dairy--although I once met someone who thought peanut
butter was made from butter and told me in a rather condescending way that I
couldn’t eat it. I put her straight.
Meat was used in ancient times to mean food--not a beverage. In the
Bible in the book of Genesis 1:29 God says Behold I have given you every
plant yielding seed which is on the surface of all the earth and every tree
which has fruit yielding seed: it shall be meat for you.Some Bibles translate it as food
for you but if you look in the original language it says meat. We also use
the word meat when dealing with nuts--we say nut meat when we get our prize out
of the cracked shell.
Colleen Patrick Goudreau (my vegan hero) suggests we reclaim these words
and use them as vegans. Why should we have to say words like when talking about our food :
Fake
Pretend
Analogue
Faux
. That sounds stupid and it makes it sound
like our food is second class or not very good. What kind of milk? Cow’s milk
or plant based milk? We prefer Oat milk. What kind of meat? Animal flesh meat or
nut meat or vegan meat? I make three different kinds of vegan sausages --why
should I have to call them what they are not? They are a spicy mixture that
comes in link and patty form. Isn’t that what sausage is?
So this recipe uses coconut meat to make coconut butter and
I am not ashamed to say that.
Coconut butter is wickedly expensive here--something like £15 for a
small tub. With my high speed blender I can make one that is nearly as smooth
as the commercial one. Yes I’m sure the commercial might be a tiny bit whippier
and fluffier, but the price difference makes me easily ignore that.
DIY coconut butter
You need:
Some bags of unsweetened dried (desiccated) coconut
That’s it! I am on the look out for some organic desiccated coconut (which
Spiderman always calls desecrated coconut) but haven’t found any so this
is the bog standard £1 bag of the stuff.
Dump 2 bags in your high speed blender--I don’t know if a regular
blender or food processor could make this work.
dry coconut in my blender
Blend like hell pushing it down with the tamper towards the blade.
liquid coconut butter in my jar
Pour it into a jar for storage.
It is all liquid-y in the photo as it is hot from the blades but in cooler
weather it will harden up pleasantly. Right now it is so hot that the coconut
oil separates and floats on the top and you have to stir it back in like
natural peanut butter.
You can store it at room temperature. If you put it in the fridge it
will become a rock that will be hard to scoop out. In spring when I made my
first batch if you used a spoon that had been run under hot water it scooped up
fine. It’s not really a problem at the moment.
Verdict:lovely and creamy--not
quite as smooth as a shop bought one, but since it only cost me £2 instead of £15
I think I can live with it.